Other Stuff
Other StuffOther Stuff
This section contains any stuff that doesn't particularly have a home anywhere else on the site. As such, there's no predicting what might show up here. Mostly, it's just random stuff interesting to my family, my friends, or myself.
Budget Home Theater Project
Budget Home Theater ProjectBudget Home Theater Project
Around the end of 2003, my wife made a serious mistake. She came up with a home improvement project where we'd remodel the basement family room into a home theater. I'd been looking at projectors and surround sound systems for a while and she'd wanted the basement remodeled for a while -- a "while" meaning "years." The agreement was that I had to stay reasonable in cost for the equipment. Thus, our personal entertainment area was born.
Room Preparation
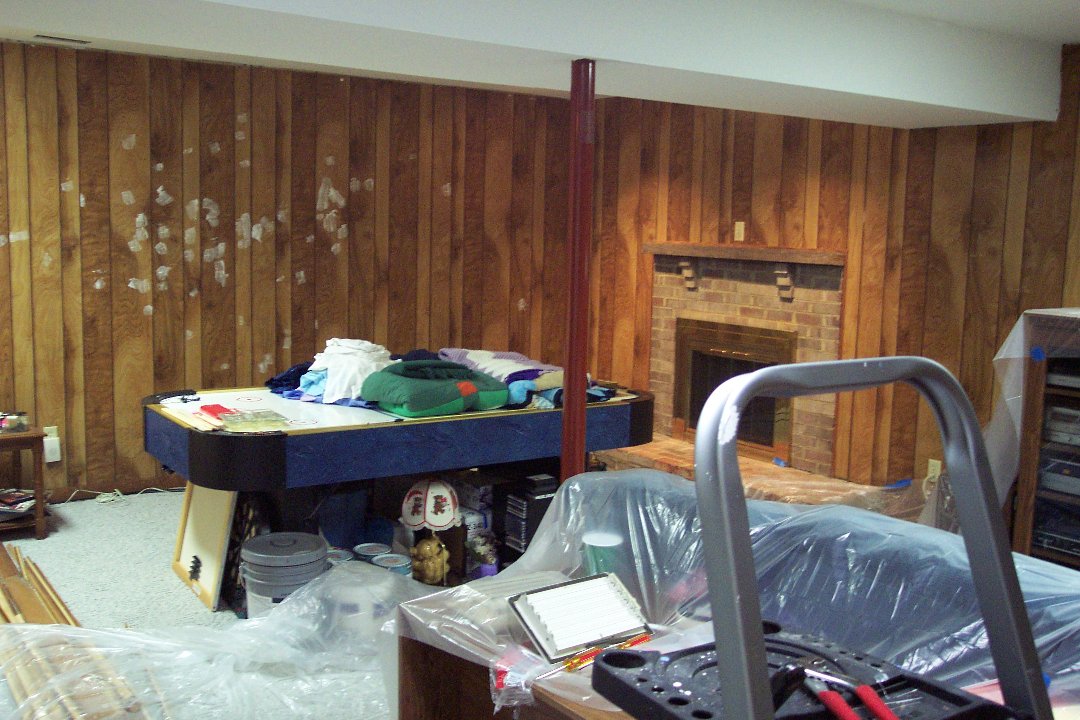
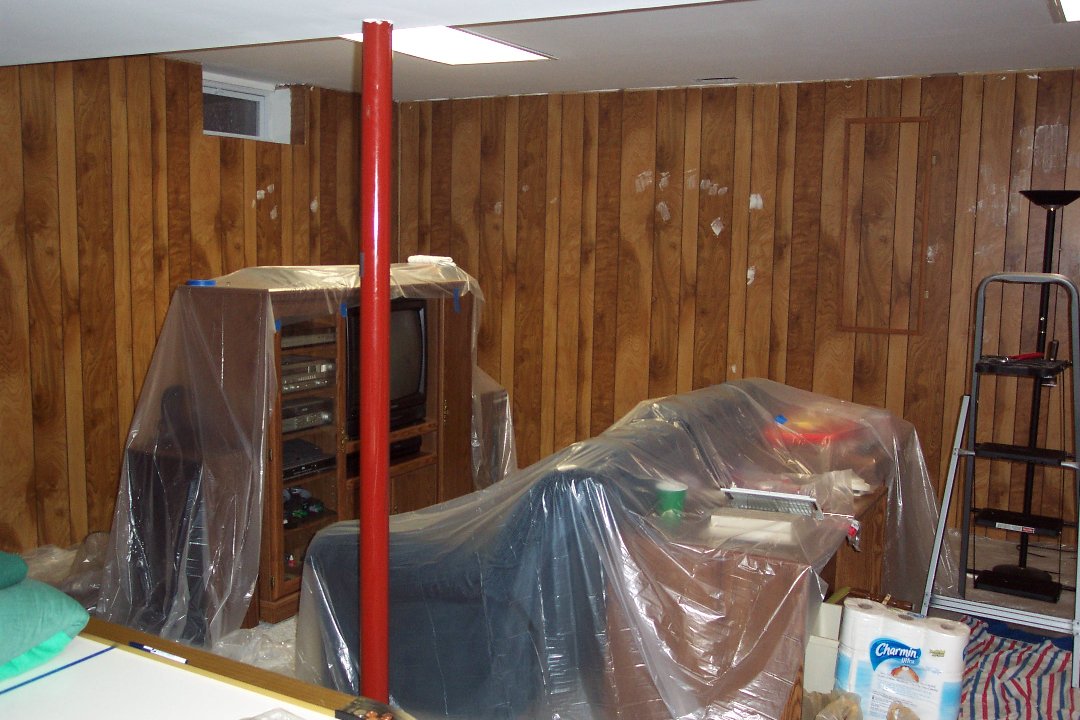
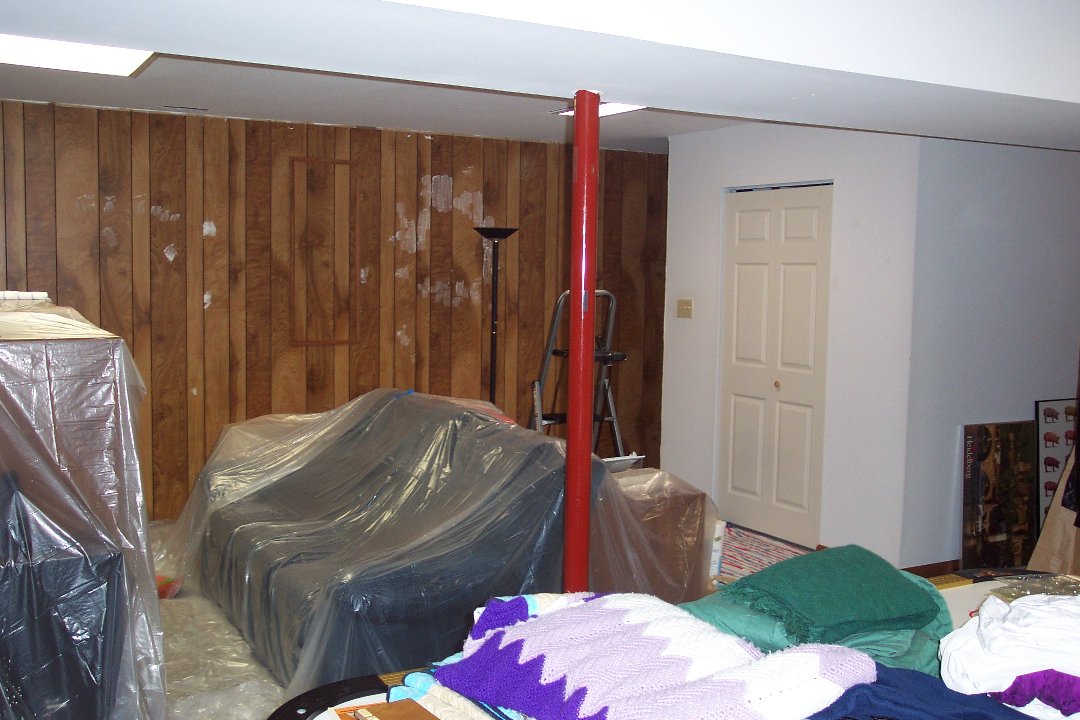
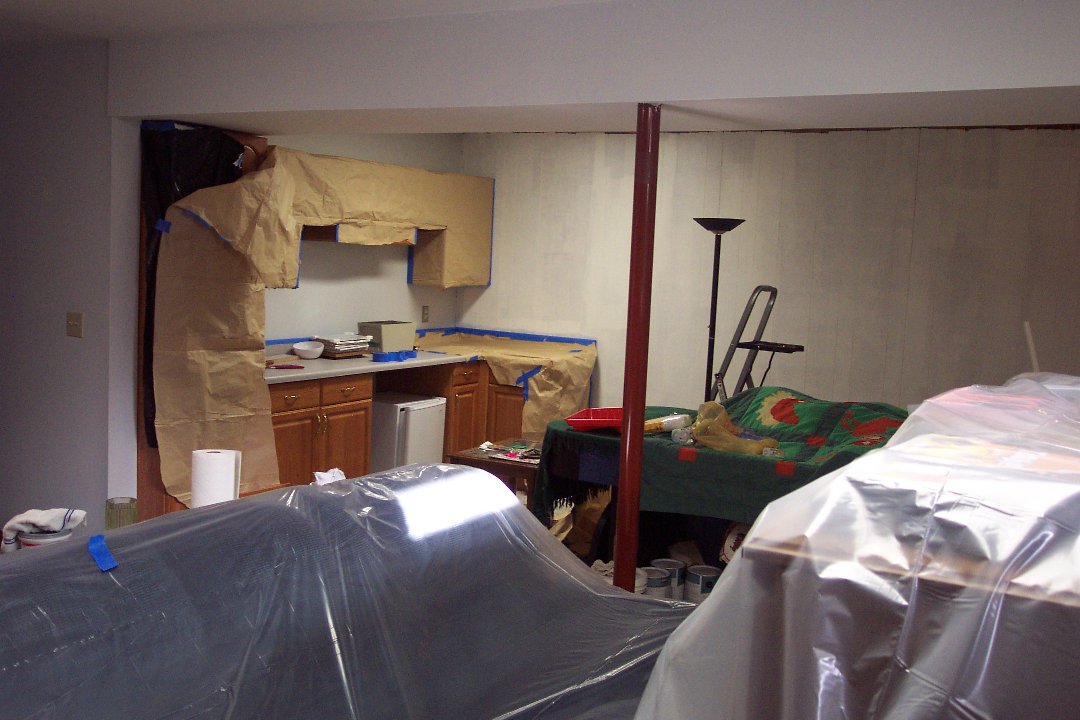
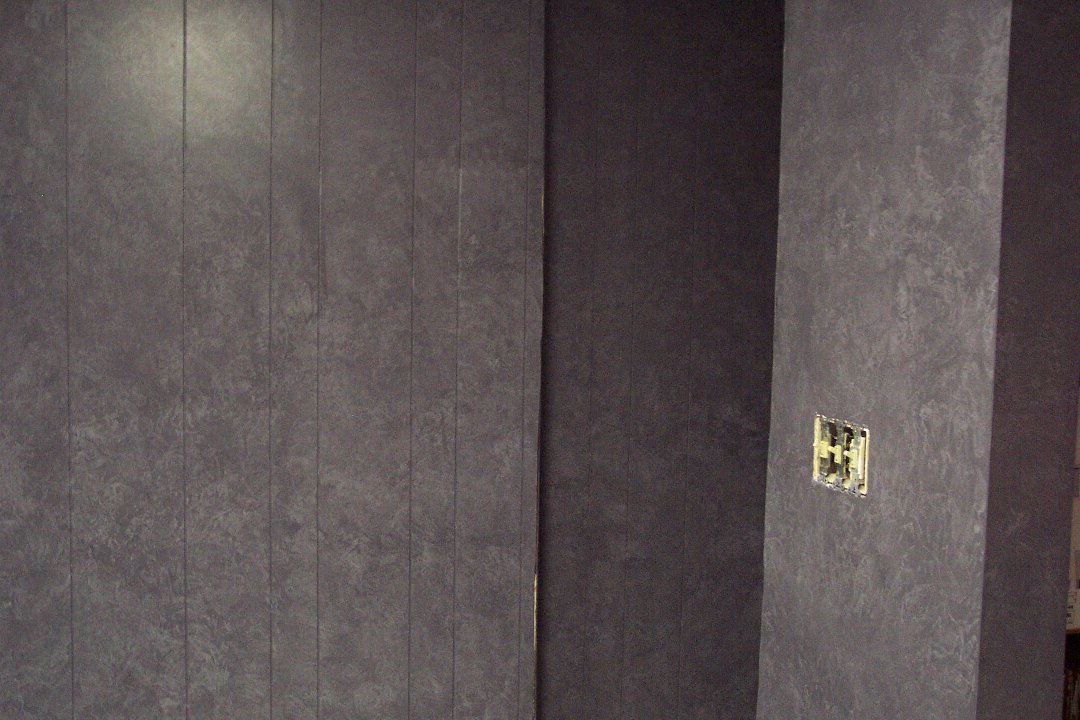
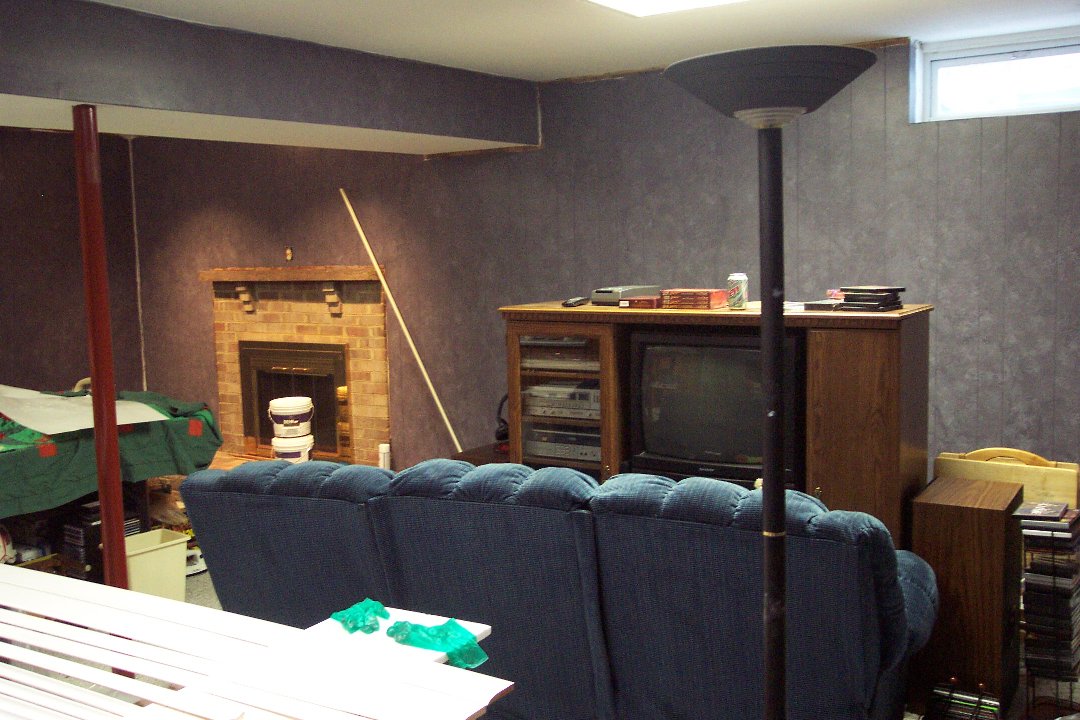
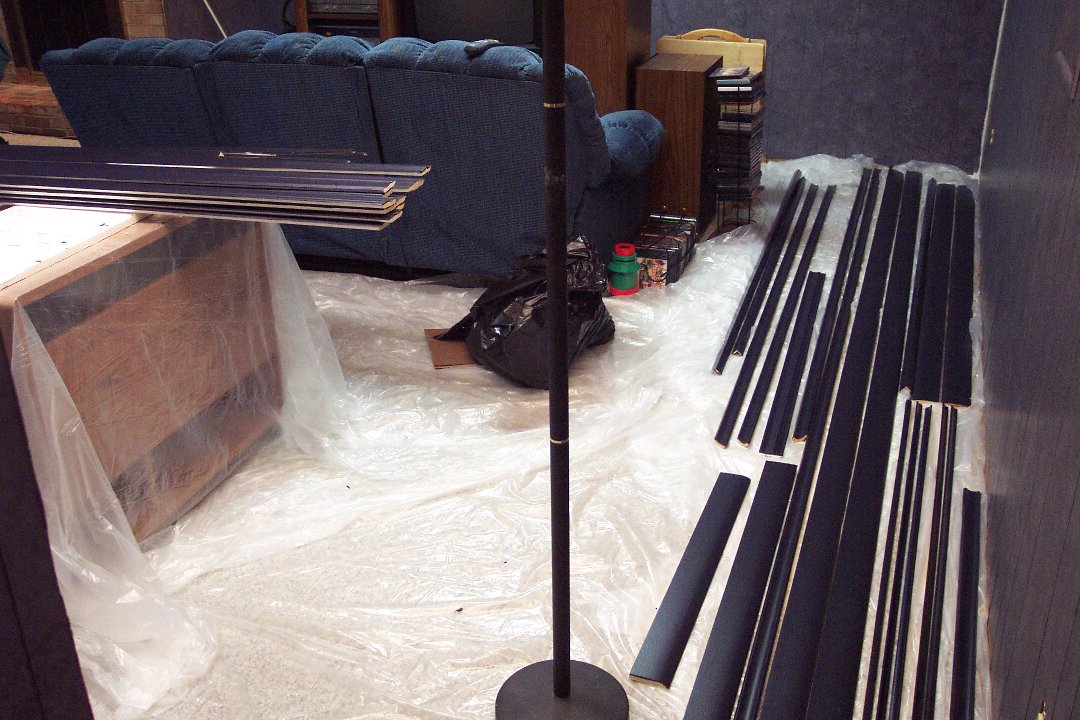
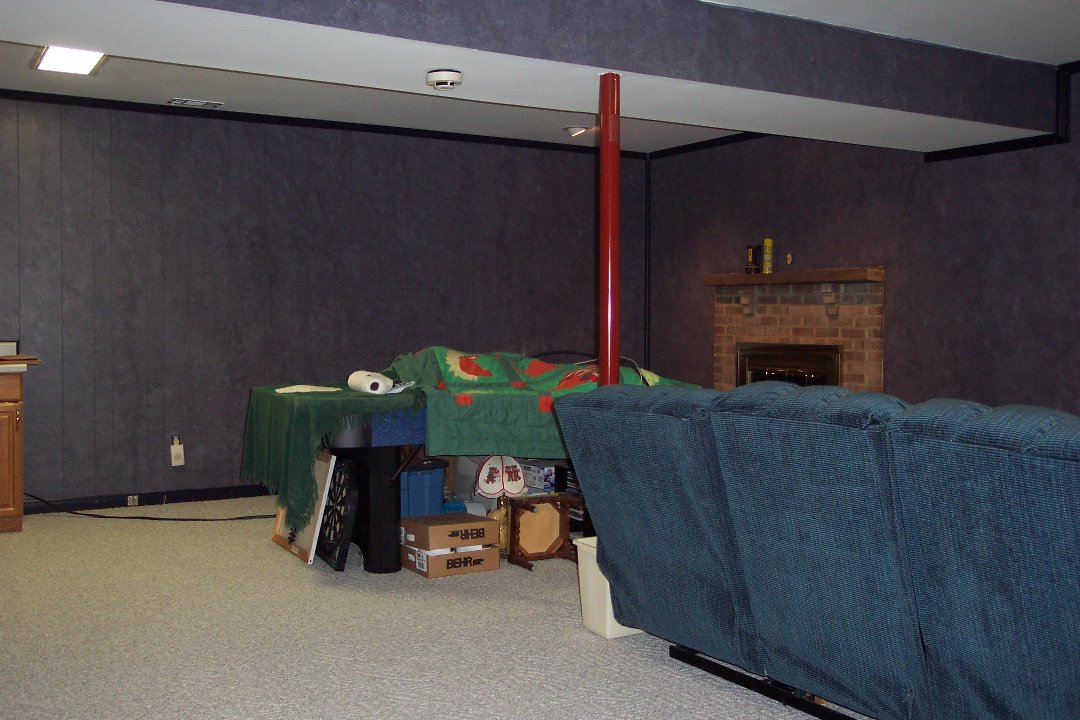
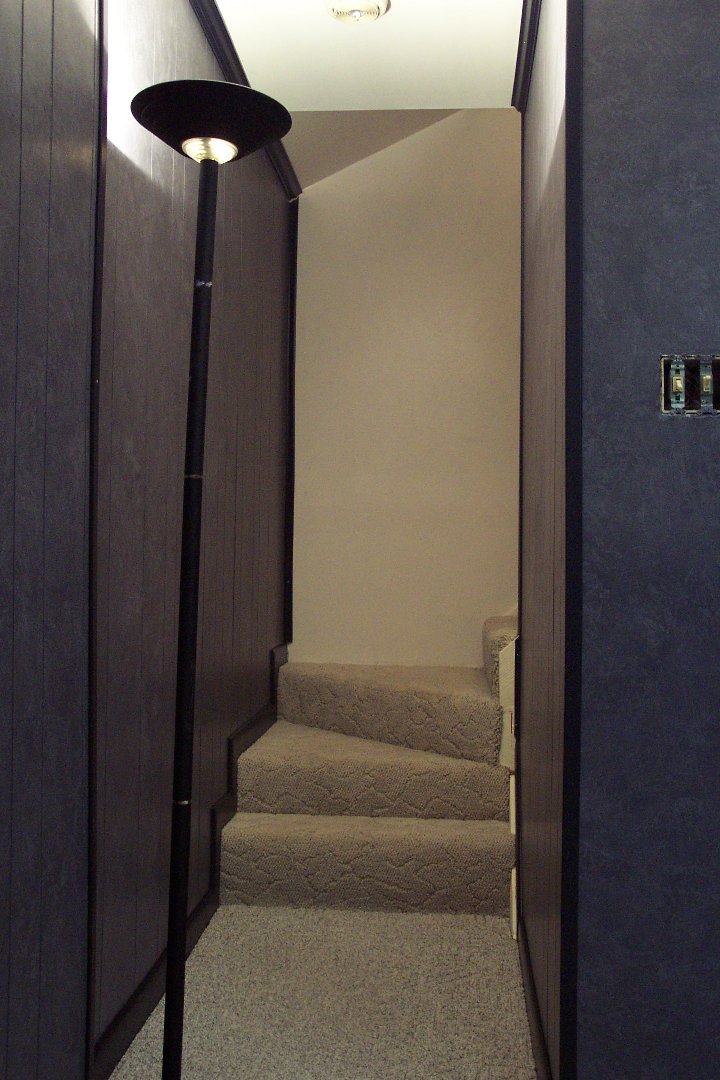
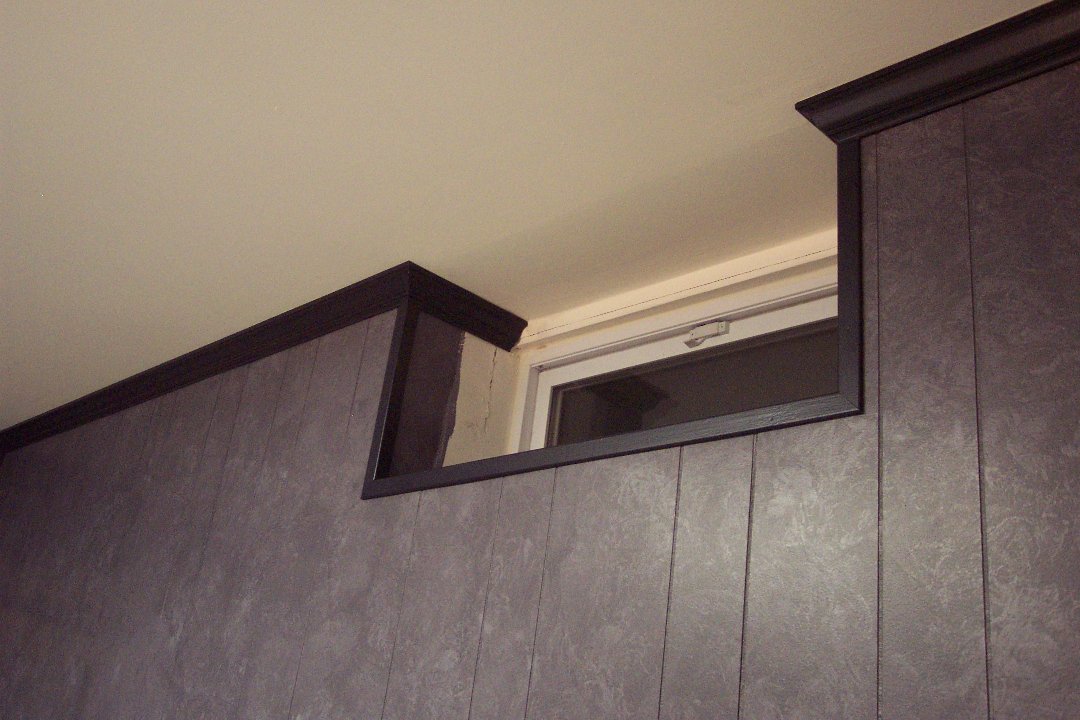
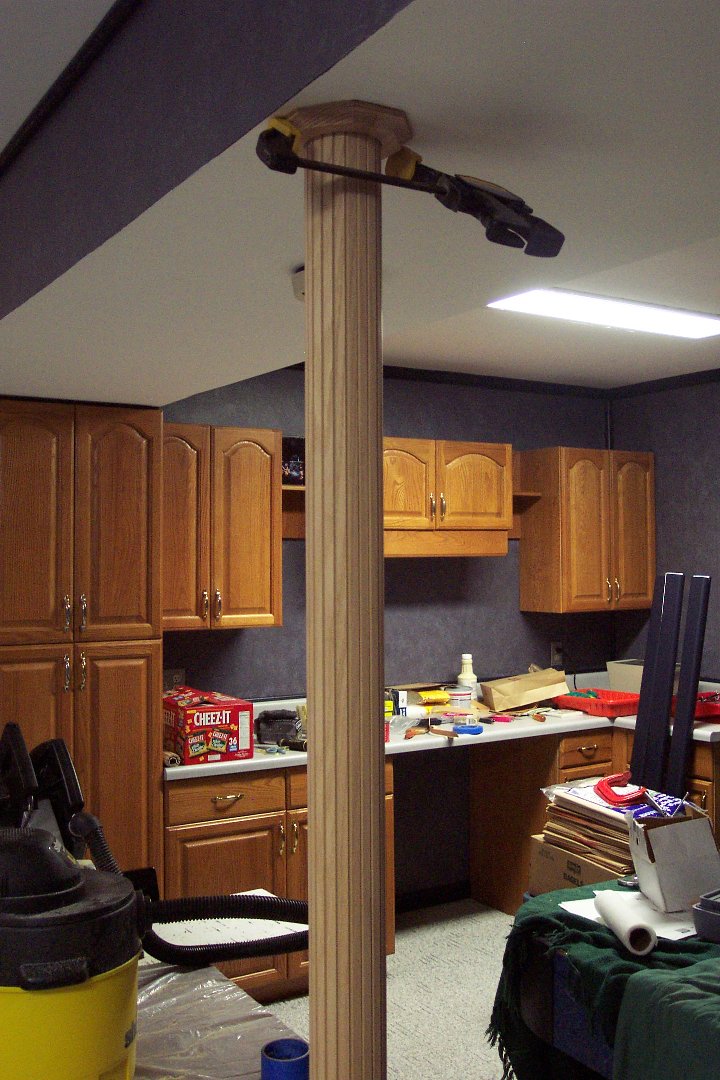
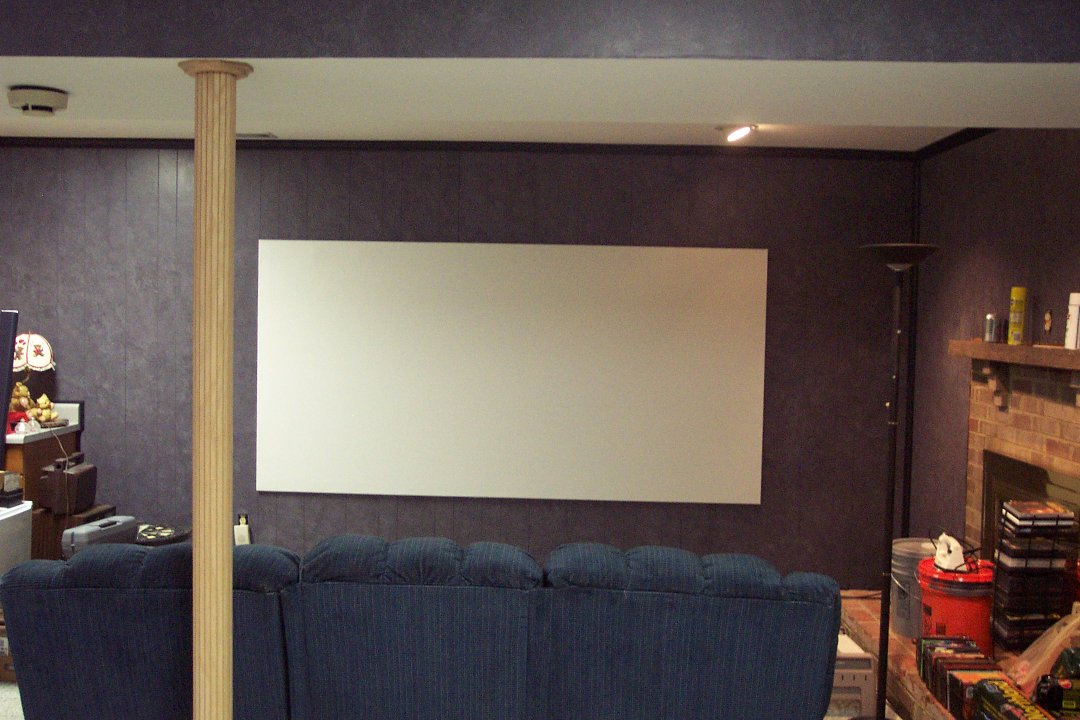
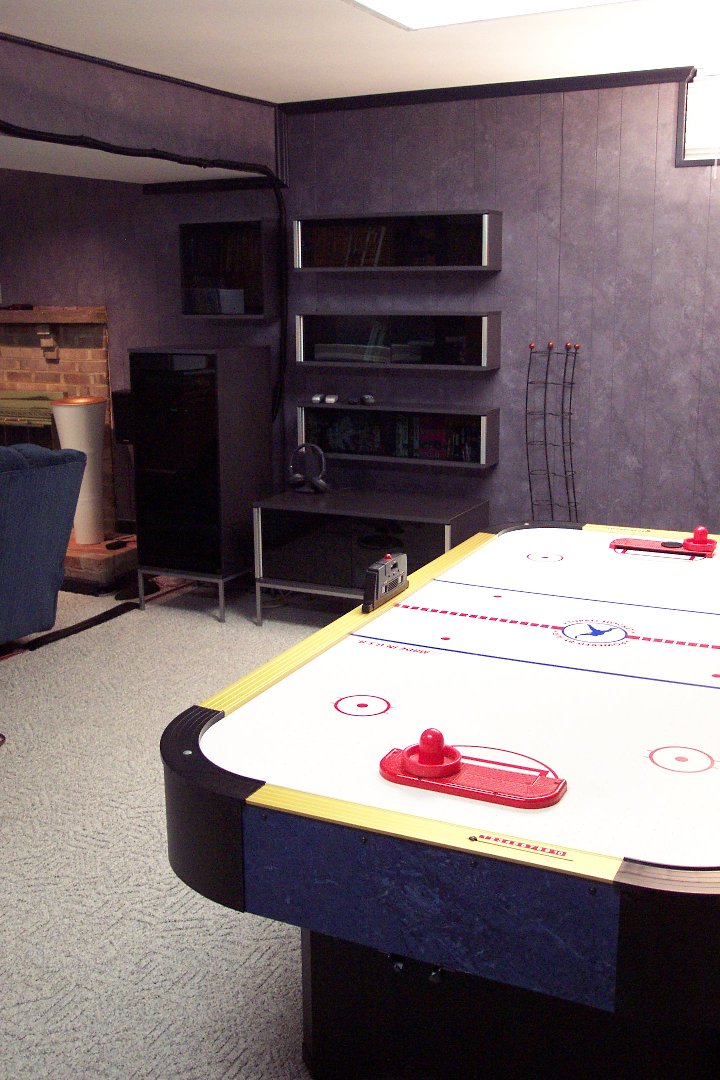
The basement family room wasn't horrible really. It was just a plain wood-paneled room with carpeting and a rather uninspiring 27" color TV. We were already getting DirectTV service at the time and HD service was coming out soon. The DirectTV package we had included a TiVo DVR for this room (as well as several other set-top boxes [STBs] that didn't have recording capability). The room was large enough for a projection screen - about 25' by 20' - but had a couple of issues to workaround. The main one, since it is in the basement, is that the ceiling drops a couple of feet in the middle of the room to allow for the main beam and ductwork to that side of the house. Oh, and it also has a lovely bright red support post right smack in the middle of the room. Here are some beautiful panoramic shots of the room just as we were ready to start. (Click on any thumbnail to see a larger view.)


The first thing we did was remove all the existing trim so it could be painted separately. Next, we taped over the counters and cabinets that were not being painted. Then we put a coat of Kilz 2 Latex Primer. Normally, I'm not all that picky about the type of primer used, but this was going over the fairly slick surface of hardwood paneling. We needed something the base paint would stick to and Kilz 2 is wonderful stuff though a bit pricey.
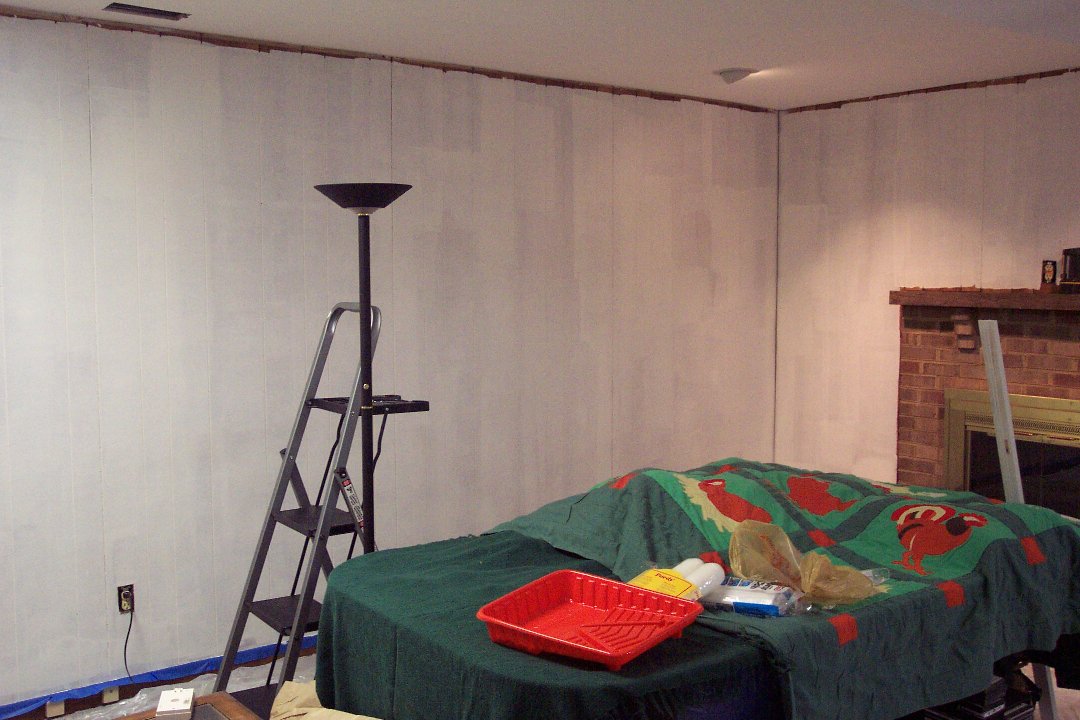

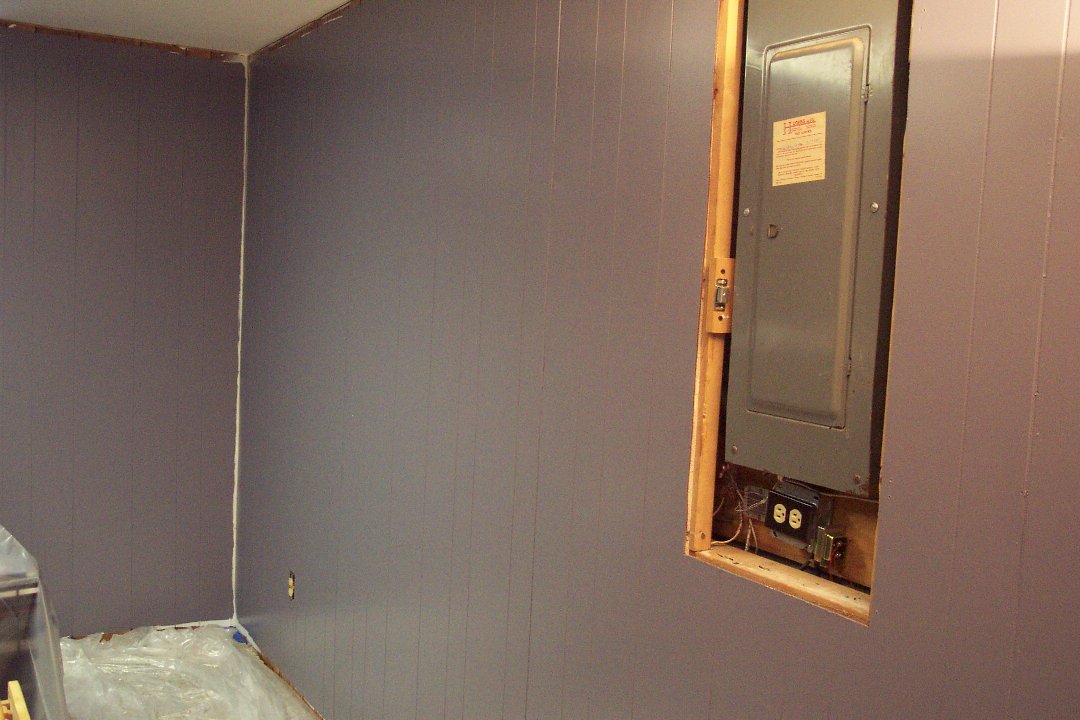
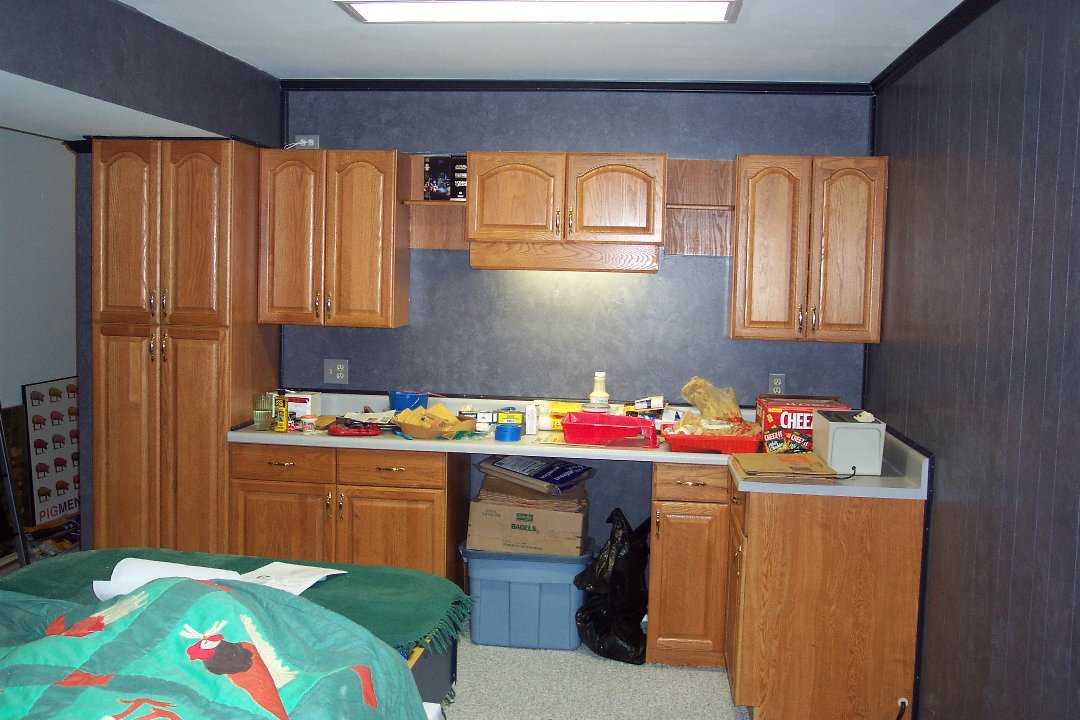
The color needs to be pretty dark for a home theater where a projector is used. However, the area was so big, that just using a single dark color would be just too much of one thing. So we decided to try something a little different and something we've never done before. We used Behr's Faux Finish Venetian Plaster technique. This technique starts with a base coat of a solid color and adds a second coat of an accent color which will then be sponged or blotted with a damp towel to get the effect. For our purposes, we needed a dark wall, so we start with a lighter base coat and later apply a darker faux finish coat. If you look at the site, there's a section that talks about How to Create a Venetian Plaster Finish. Near the bottom of that section, it is mentioned that a water-dampened rag is used. We used Scott's Rags in a Box for this. They were perfect for this job. They are a little stiffer than cloth rags and removed the top coat very easily. We got a great effect. We were a bit worried that the glaze in the topcoat would leave a shiny, reflective surface, but in reality, it dries to a very matte finish.


Since we were running with a budget, we decided just to paint the baseboard and crown molding rather than buy new. We did buy a couple of pieces of baseboard and crown molding to cover areas not covered before plus some new cove and outside corner pieces. We bought got a couple fancy scroll work trim pieces, too. I was rather surprised just how good the old varnished wood looked with a coat of paint. That meant, I didn't have to cut it to fit either. Here again, the key was to use a dark color. I'm sure there are more pictures here than anyone would ever care to look at.

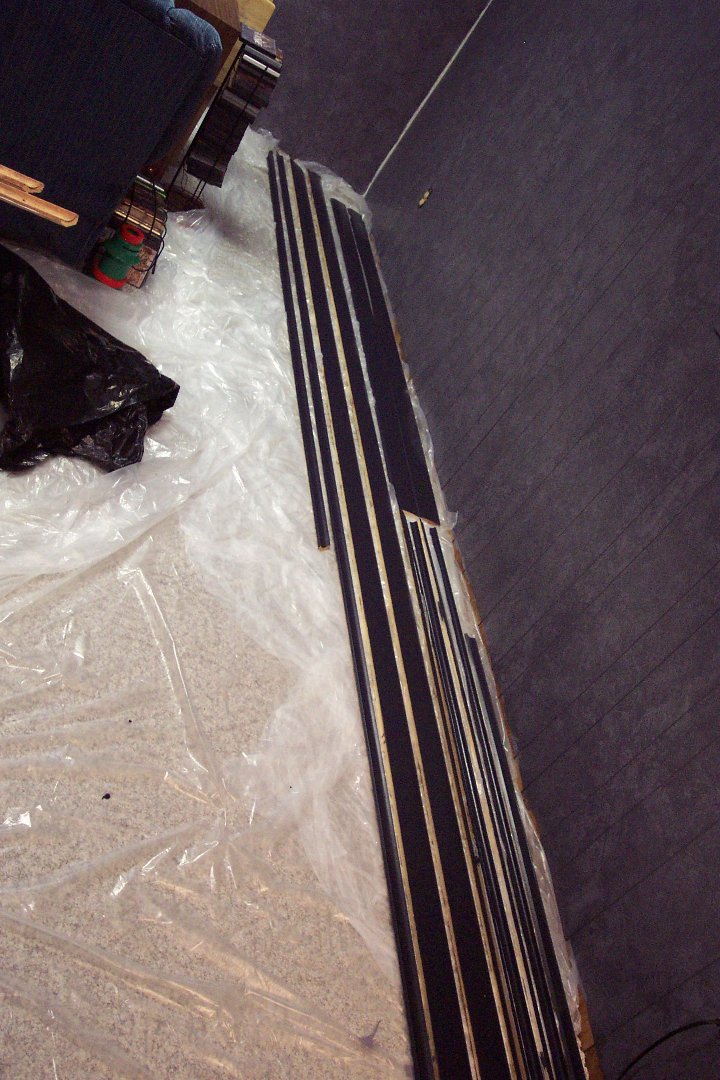
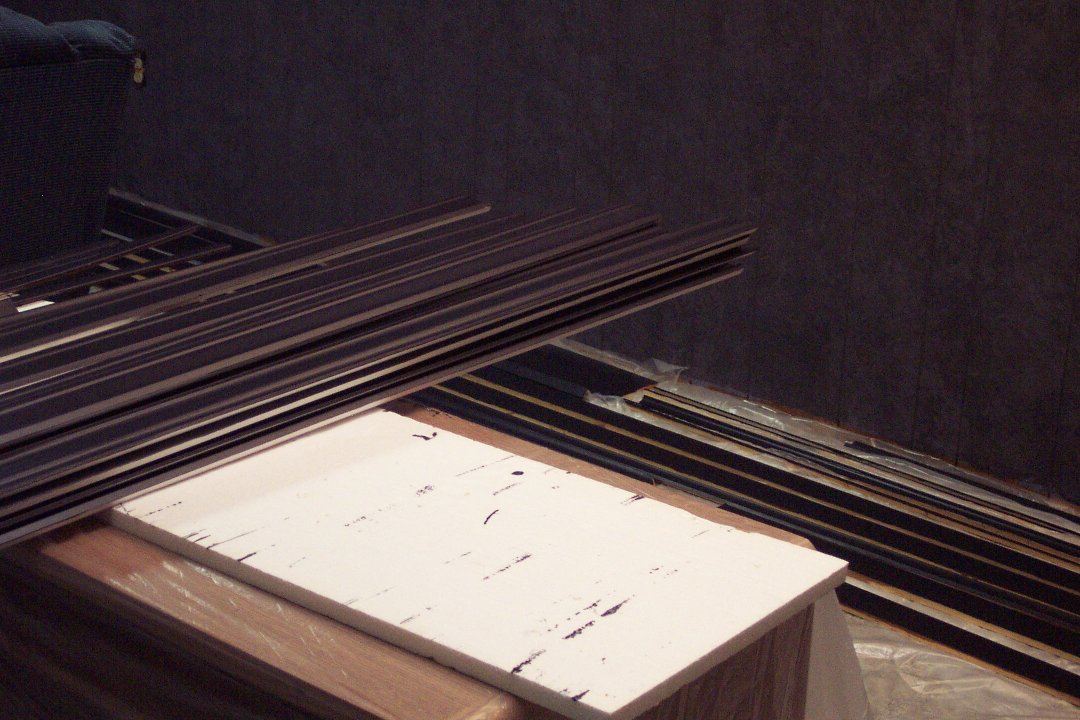
Once it was painted, it was time to start putting it back up. It really went up with no problems since most of it went right back where it came from. The fun part was touching up the paint over all the little nail holes filled with white painter's putty. Again, there are way more pictures here than you probably care to look at.

Fun With Wire
Fun With WireRoom Preparation - Continued
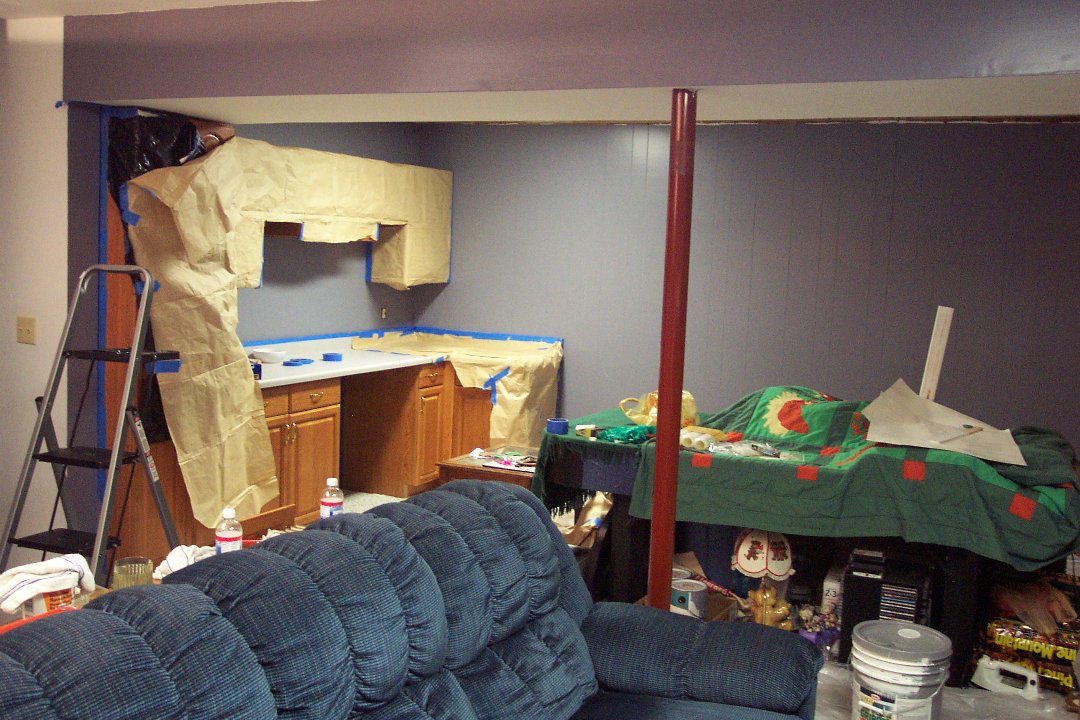
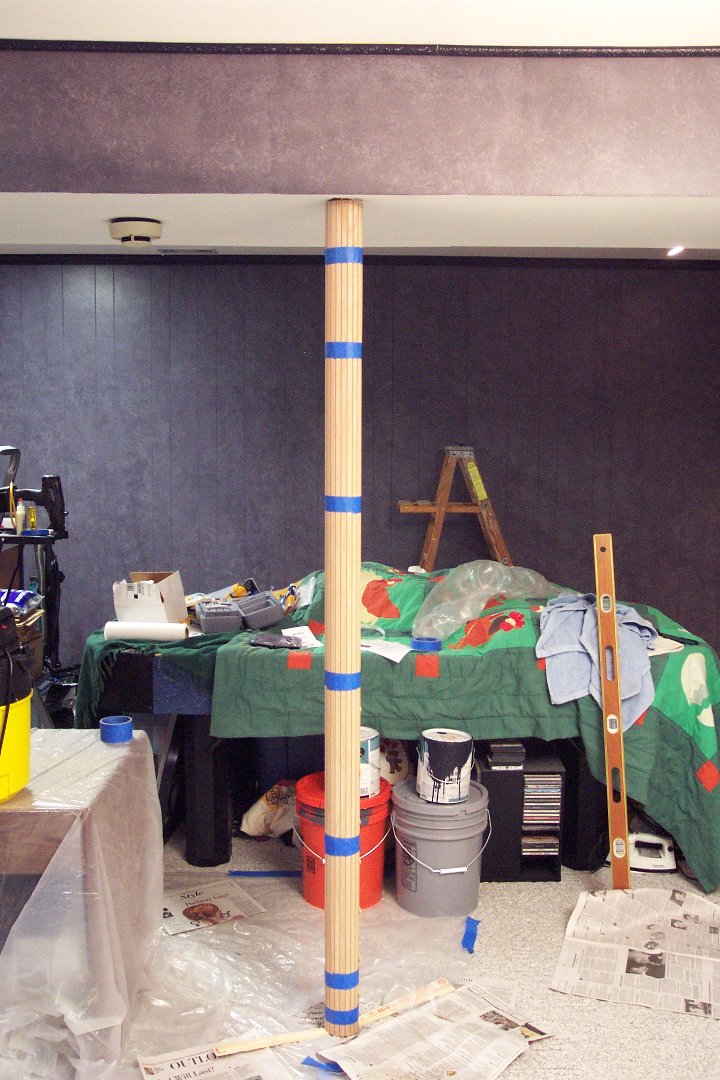
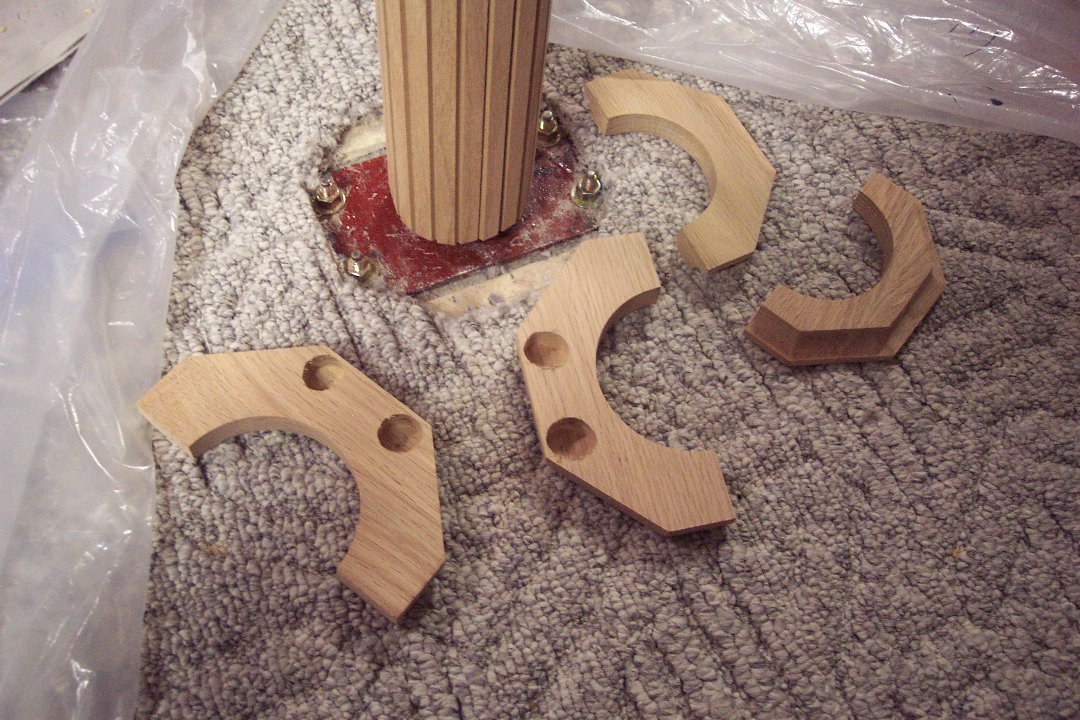
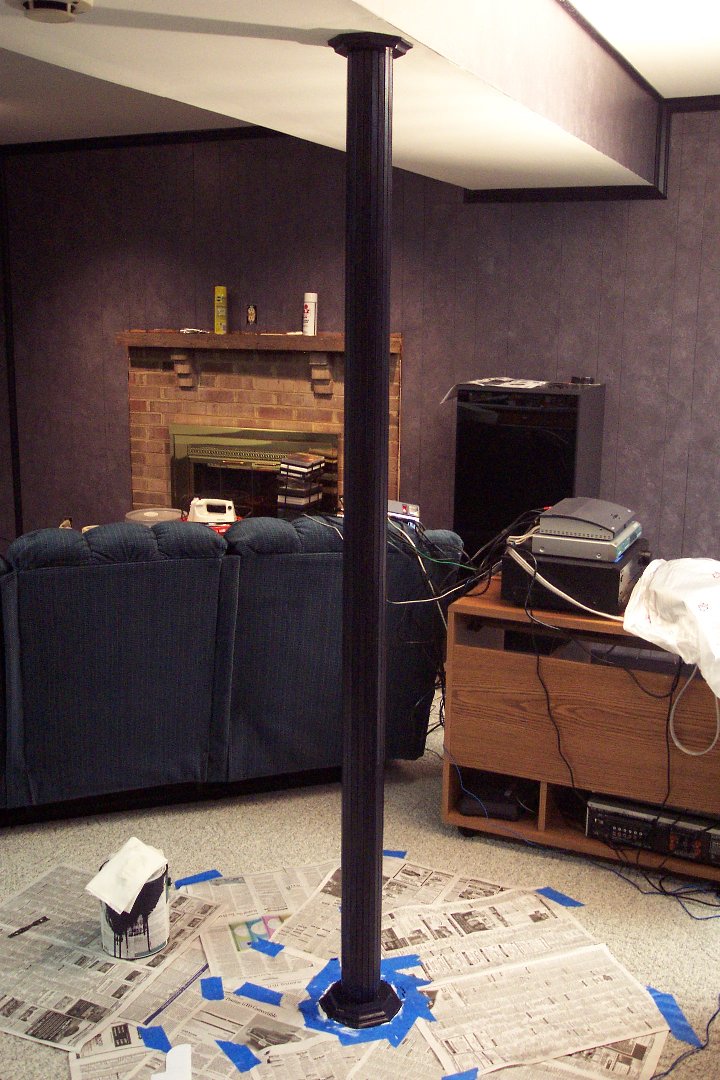
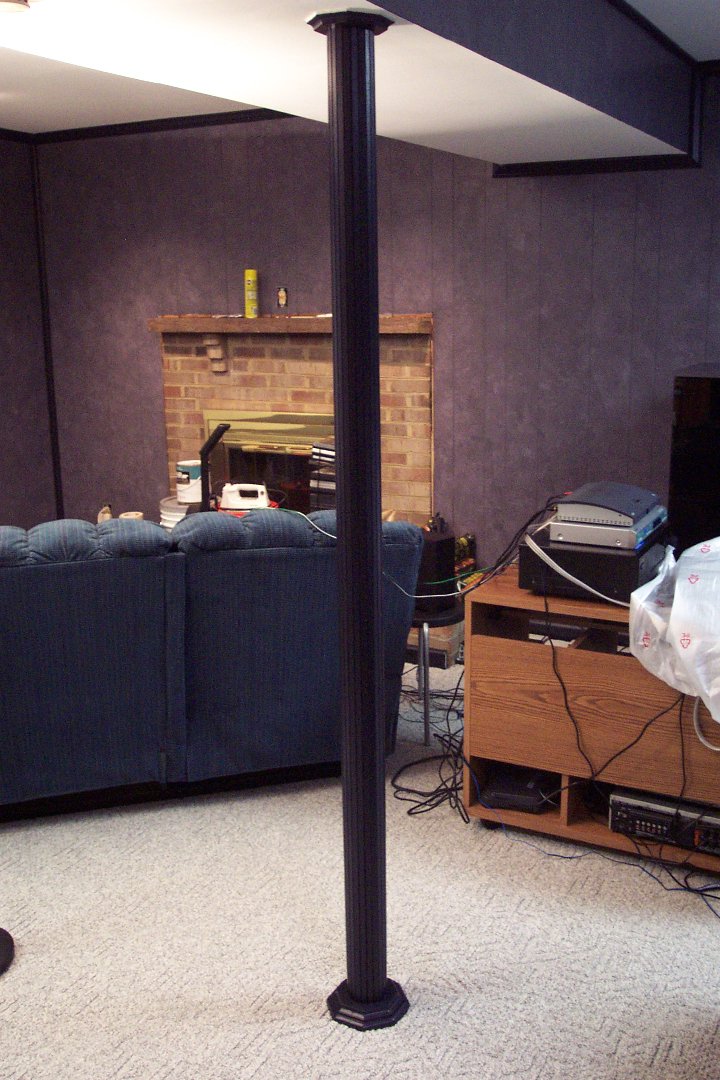
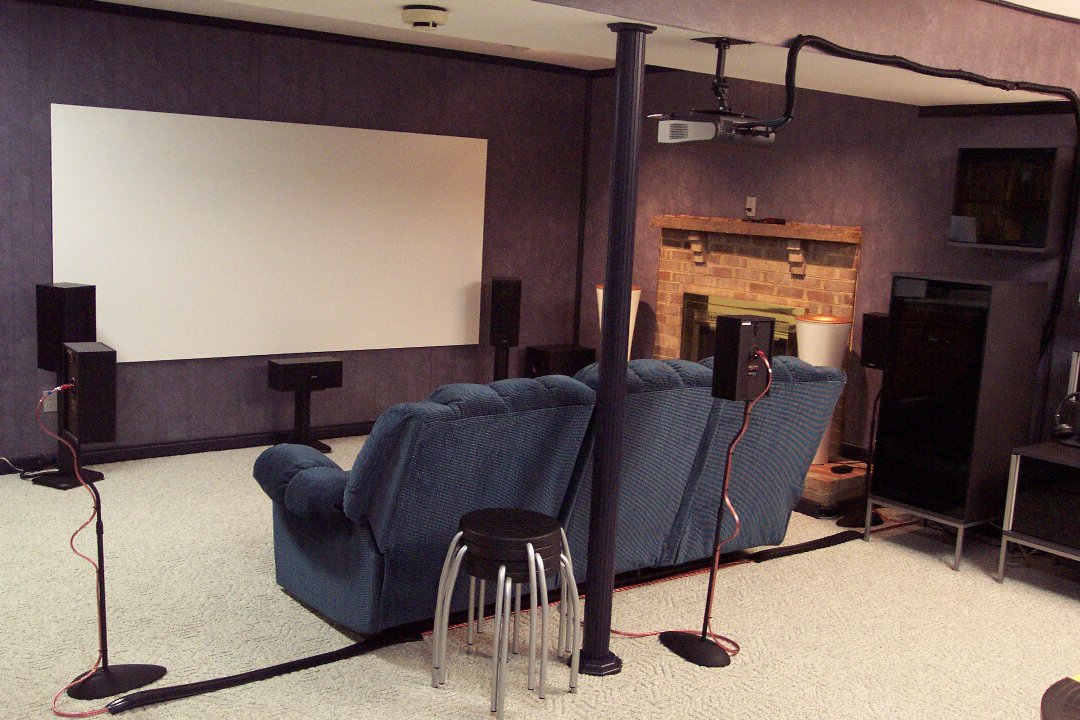
We had to come up with a way to hide the unsightly bright red support post (short of removing it). I could have just painted it the same color as the trim, but instead, we found a product for wrapping the pole with thin, cloth-backed wood strips that gave it the appearance of a wood column. This product is made by POLE-WRAP. (Apparently, I'm not the only one with trouble thinking up catchy names.) At the time, we had to special order the kit from an Internet hardware outlet, but now, it can be found at most Lowes and Home Depot stores (or ordered online). Since we planned on painting the wood to match the trim (and to be dark), we got whichever wood type was cheapest at the time. The end result was pretty stunning.

Fun with Wire
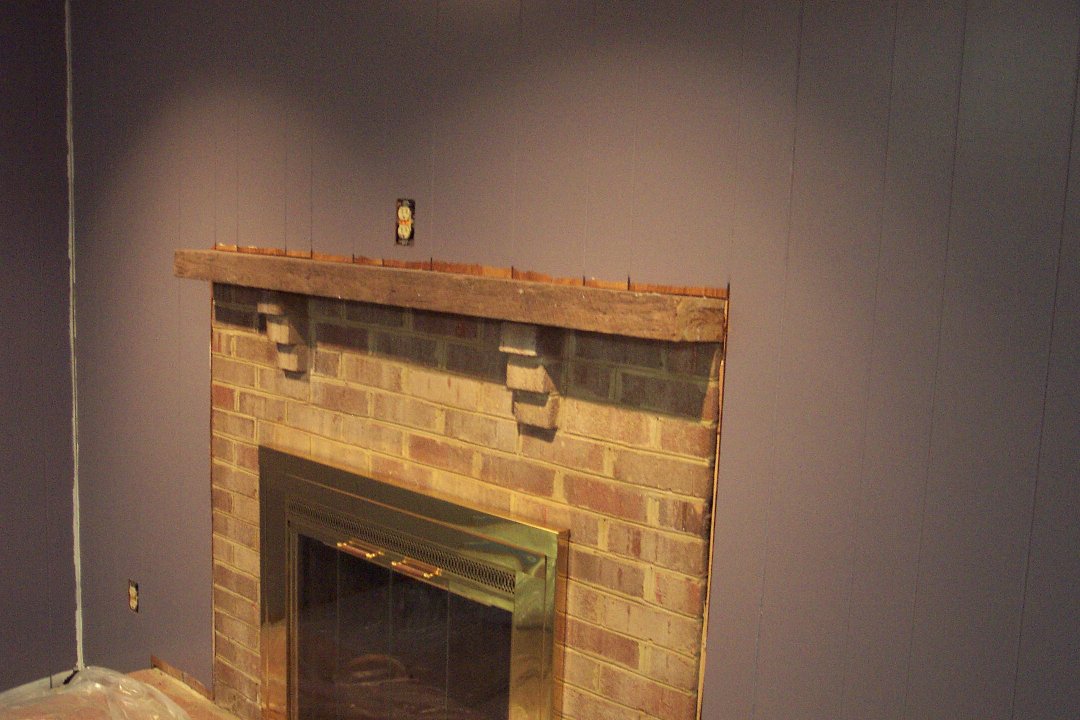
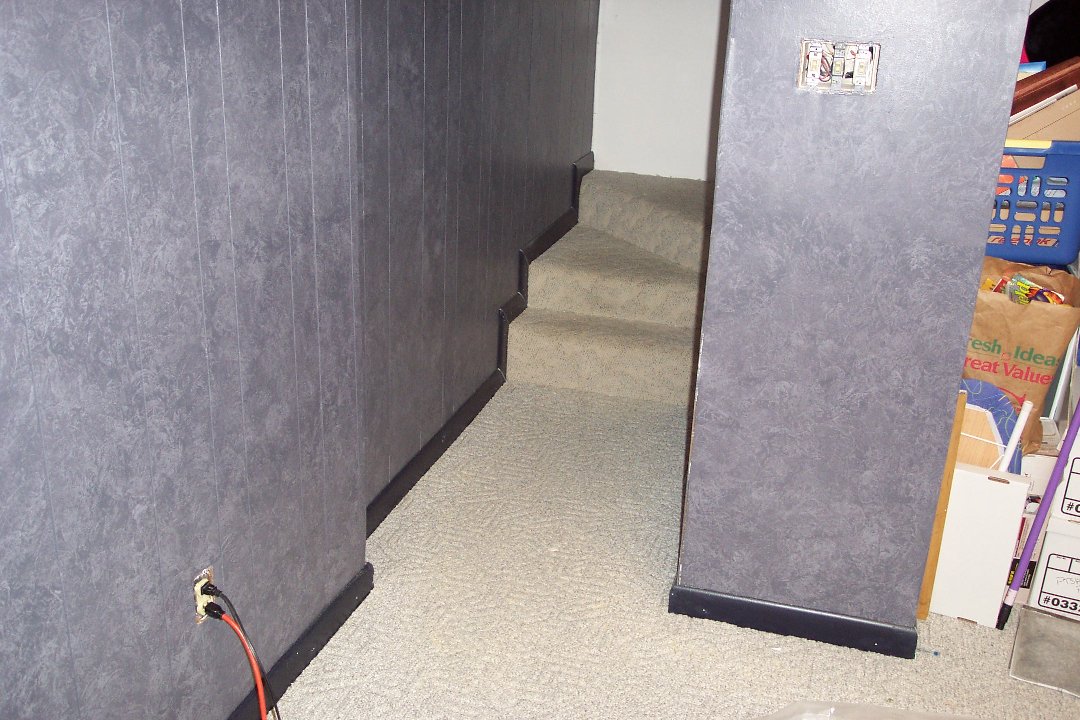
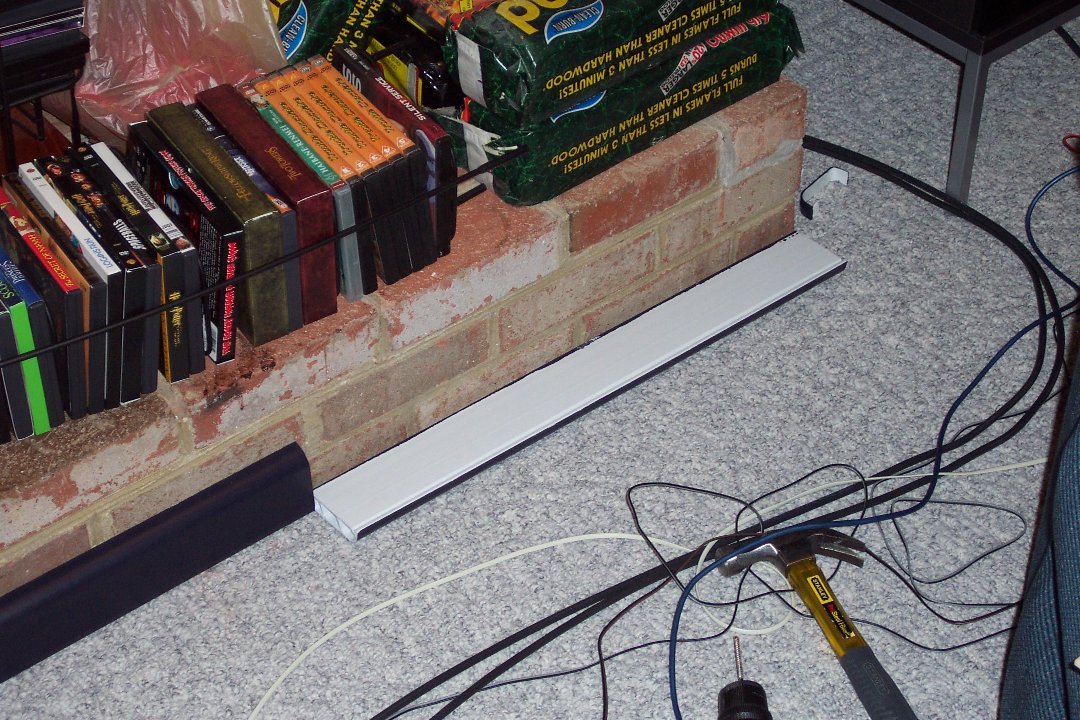
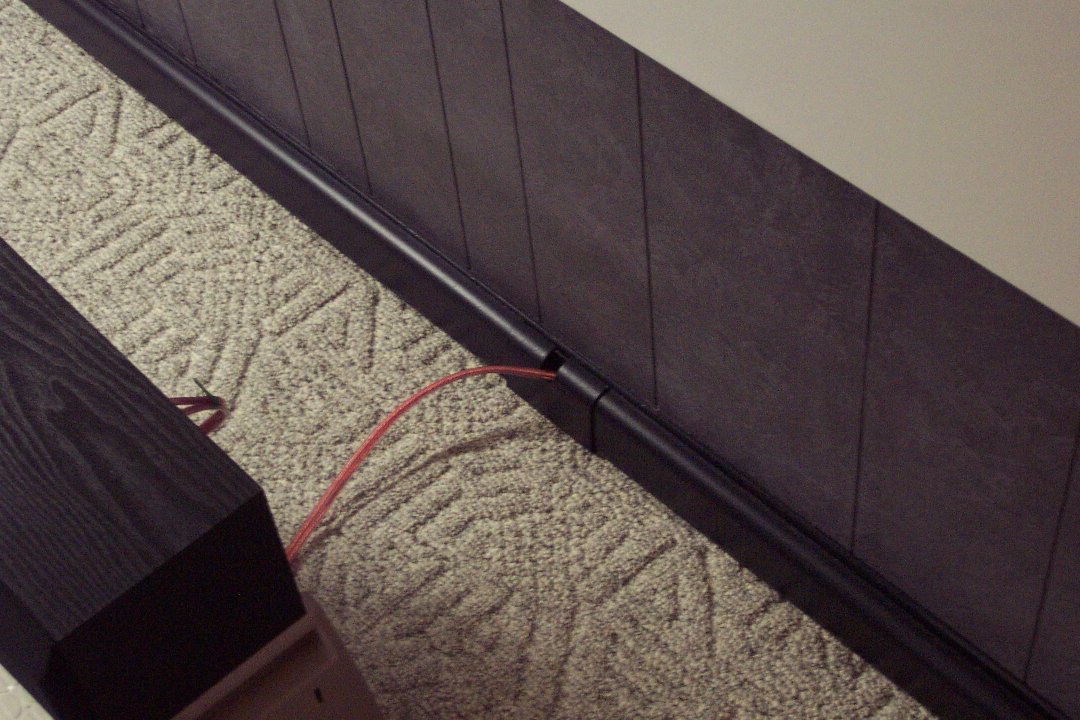
Cable management in a home theater is always a challenge. Running the audio cables was one of the hurdles to be overcome next. Being a basement family room, the floor is concrete, so they could not be run through the floor. The walls are wood paneling attached with furring strips to the concrete block. We could have notched out the bottom and run the cables through that and behind the baseboard. My problem is we wanted to be able to swap cables in and out as we added or changed equipment. Removing the baseboard every time didn't sound like fun. Our solution instead was to use a fake baseboard that contains cable trays inside. We used Wiremold's Cablemate system. They make both a chair rail and baseboard solution. We used the C800, C82 and C90 pieces. They are easily paintable once primed with Kilz 2. Rather than replace the existing baseboard with these, we just mounted them on the front of the baseboard. One reason we did this is that we needed something to go around the brick of a fireplace that had no baseboard. It was also just easier. Painted the same dark color as the trim, they disappear into the woodwork. (Pun intended.)
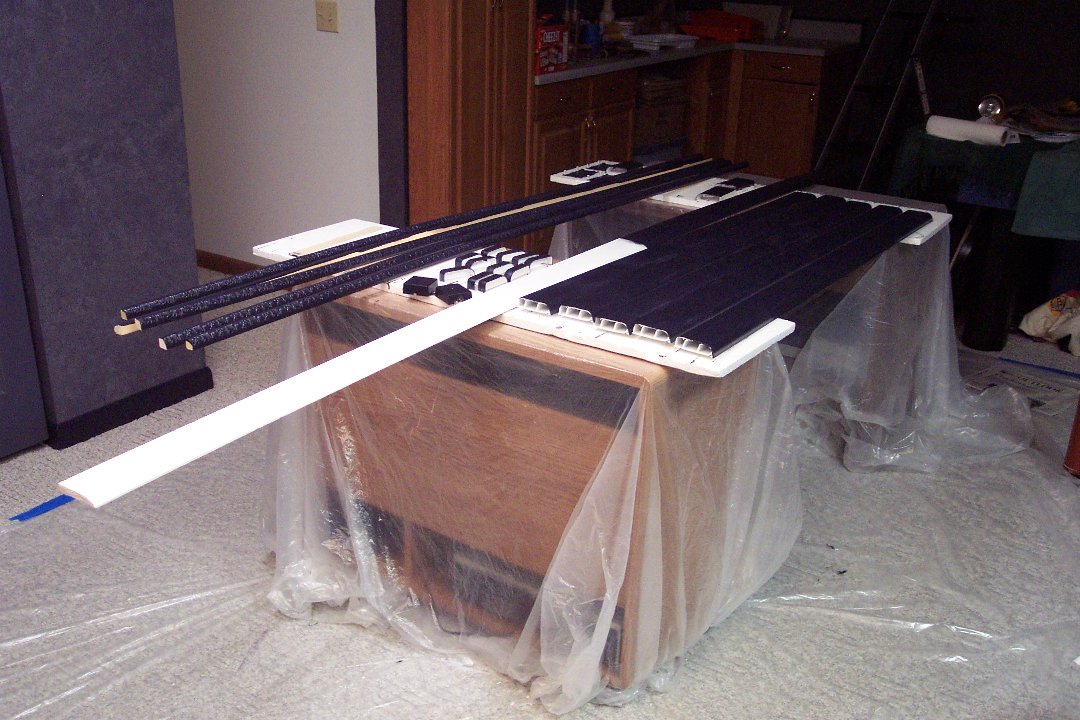
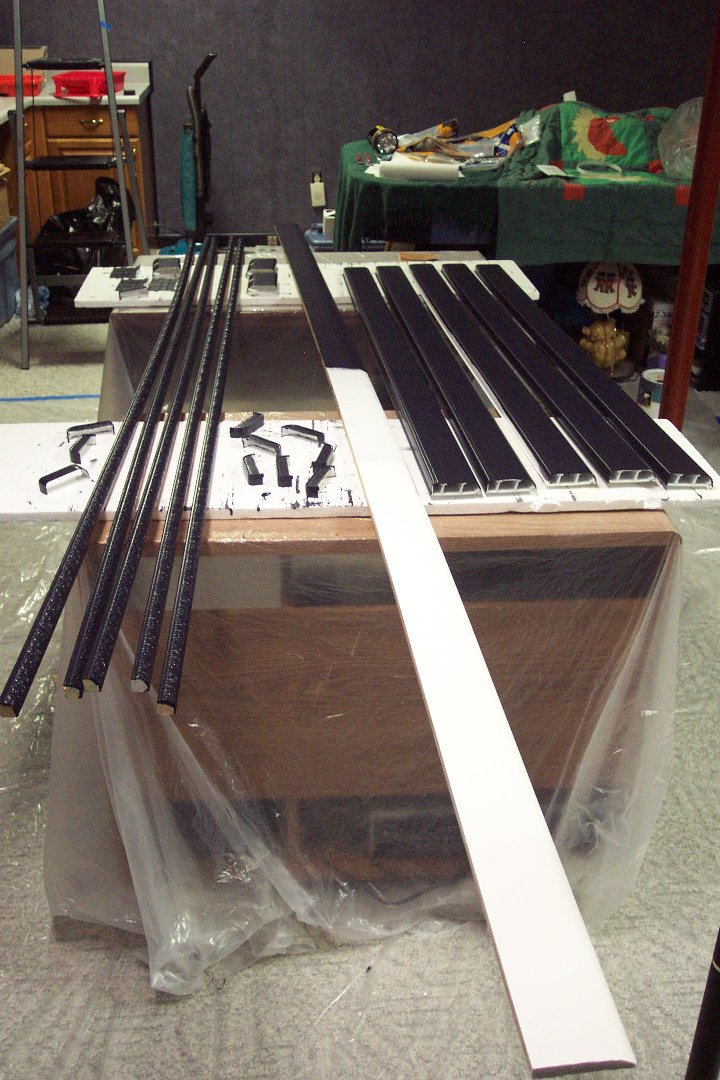
Once painted, the cable channel baseboard was mounted to the existing baseboard and the fireplace. We used 2" double-stick tape around the fireplace. We didn't want to make the very hard bend in fairly thick audio cables at the corners, so we left those open. These were later covered by short sections of 1-1/2" black, flexible split wire loom.

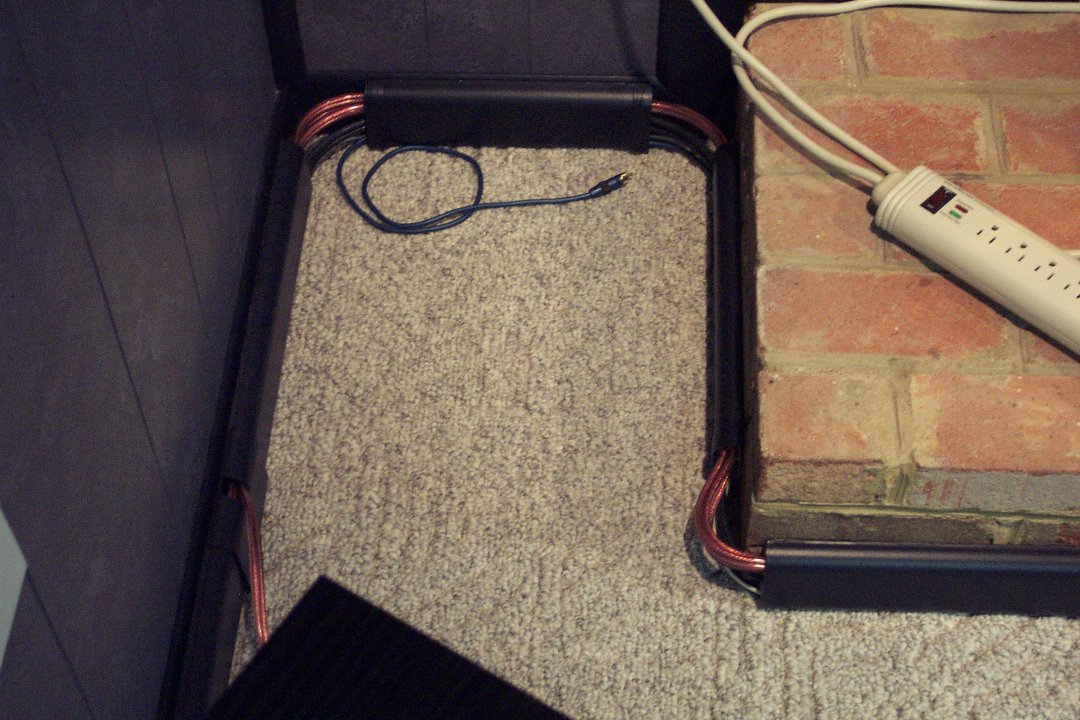


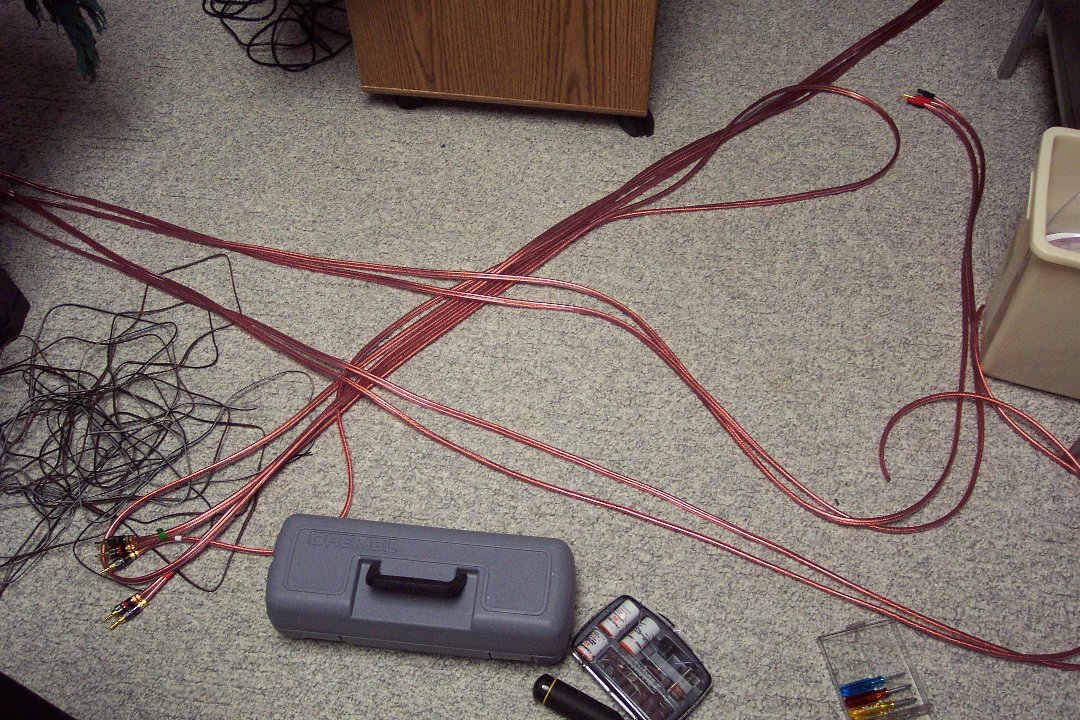
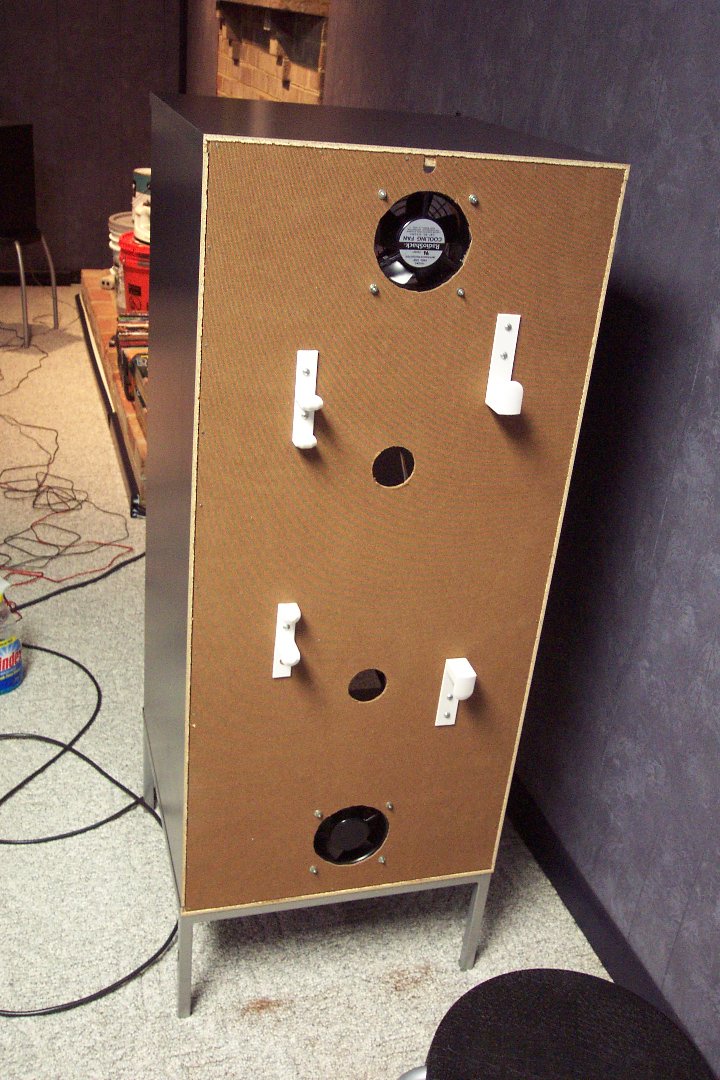
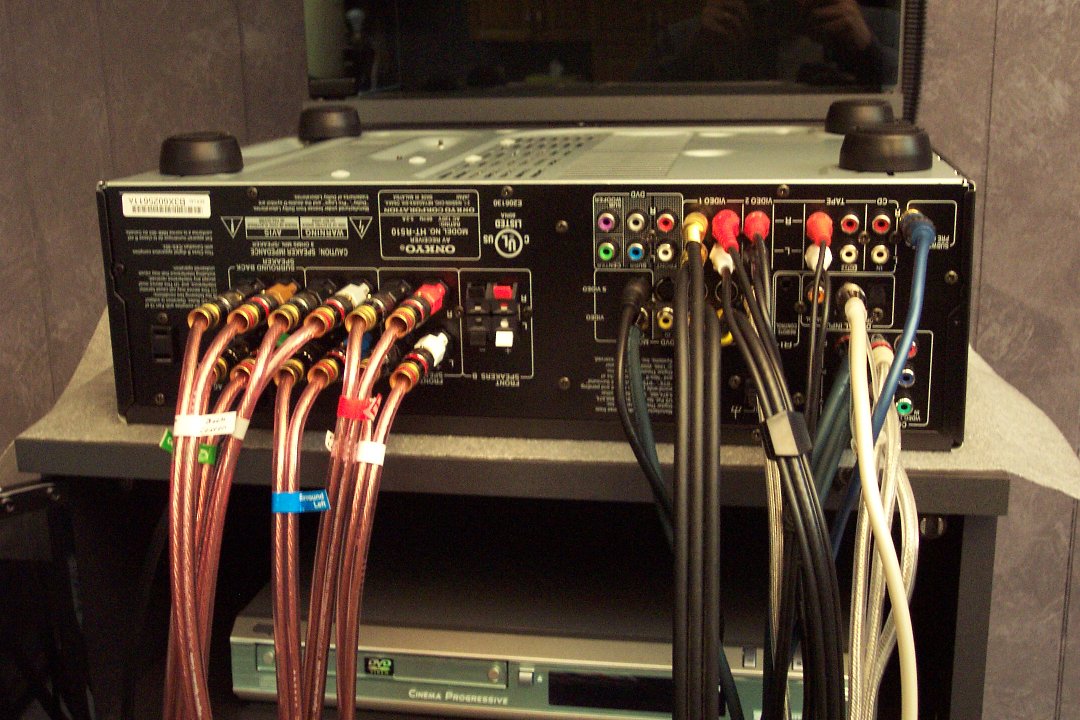
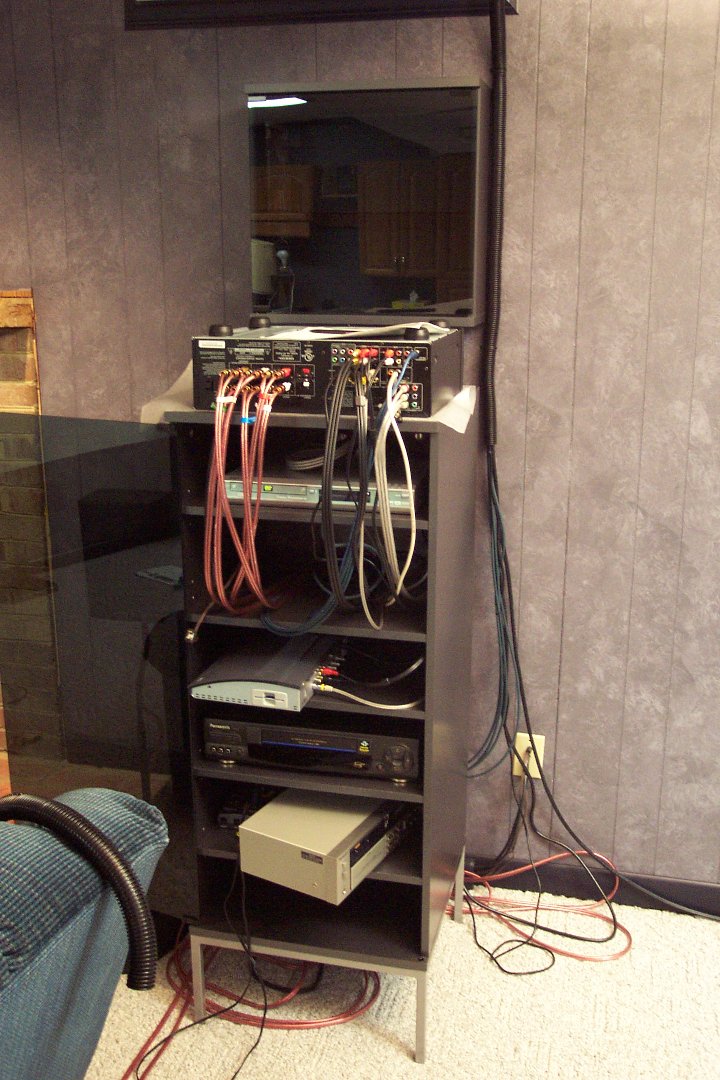
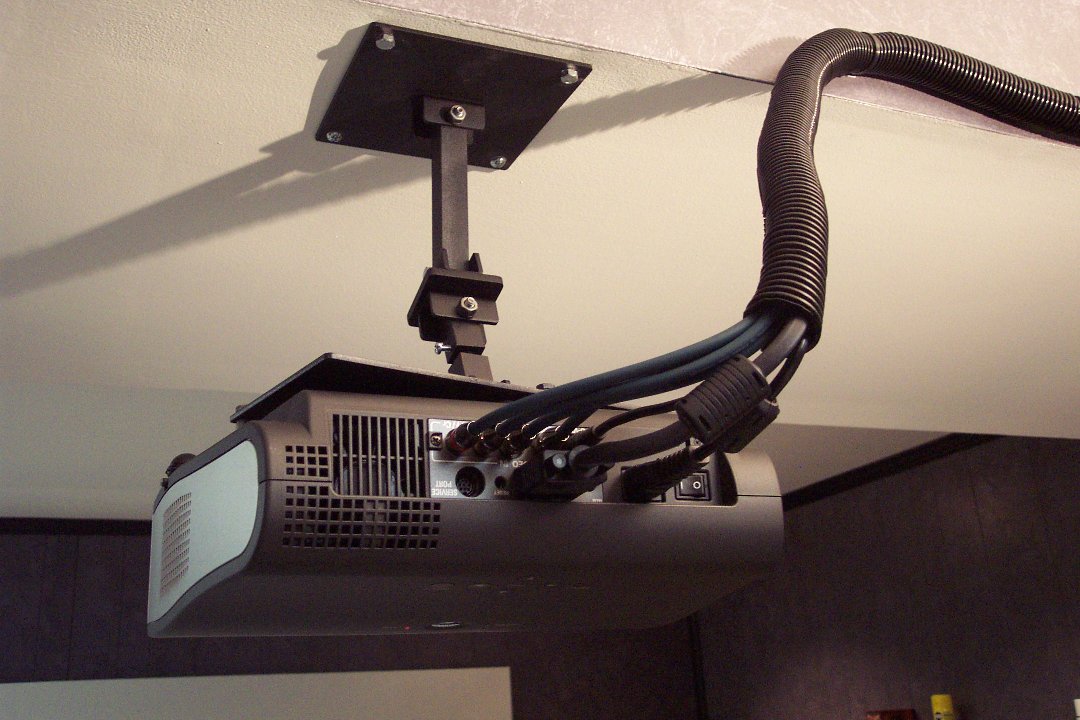
The audio cables were an interesting problem in their own right. We wanted good quality cables, but the cable runs to the farthest speaker (the left front in my case) was about 30 feet. Pre-manufactured cables in that length are fairly expensive, so we opted to buy a large spool of high-quality speaker cable (I refuse to call it wire) and a set of banana plugs for the amplifier end and pin plugs for the speaker end. There was a good evening of soldering involved here alone. Because I cut all the wires to the same length and somewhere very near to where the equipment cabinet was going to be placed, the cabinet itself was fitted with "cable management" posts. These were at one time over the door clothes hangers. They were hacked to be used here. A couple of 110V 120mm fans were added to force some air circulation. The audio cables weren't alone. The projector has component, composite, s-video and VGA inputs. We can't leave any of those not connected, right? Right.
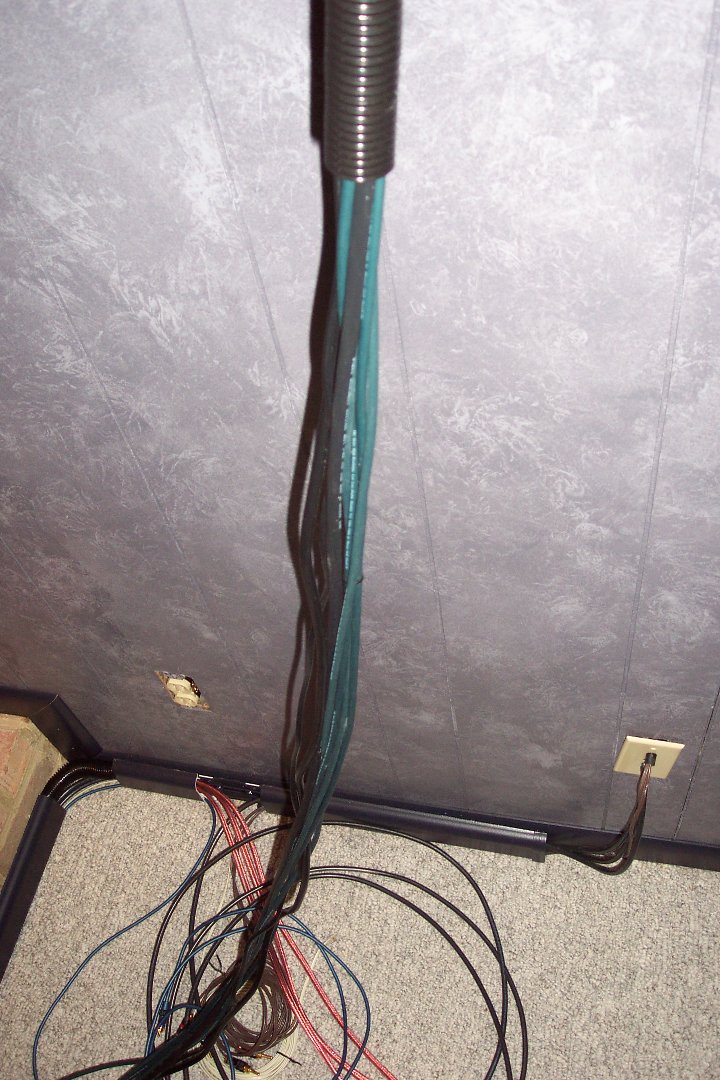
Once the audio cables were buttoned up in the Cablemate moldings and the video cables were attached and run through some even larger split wire loom, we were finally ready to hook everything up.
The Good Stuff
The Good StuffThe Good Stuff
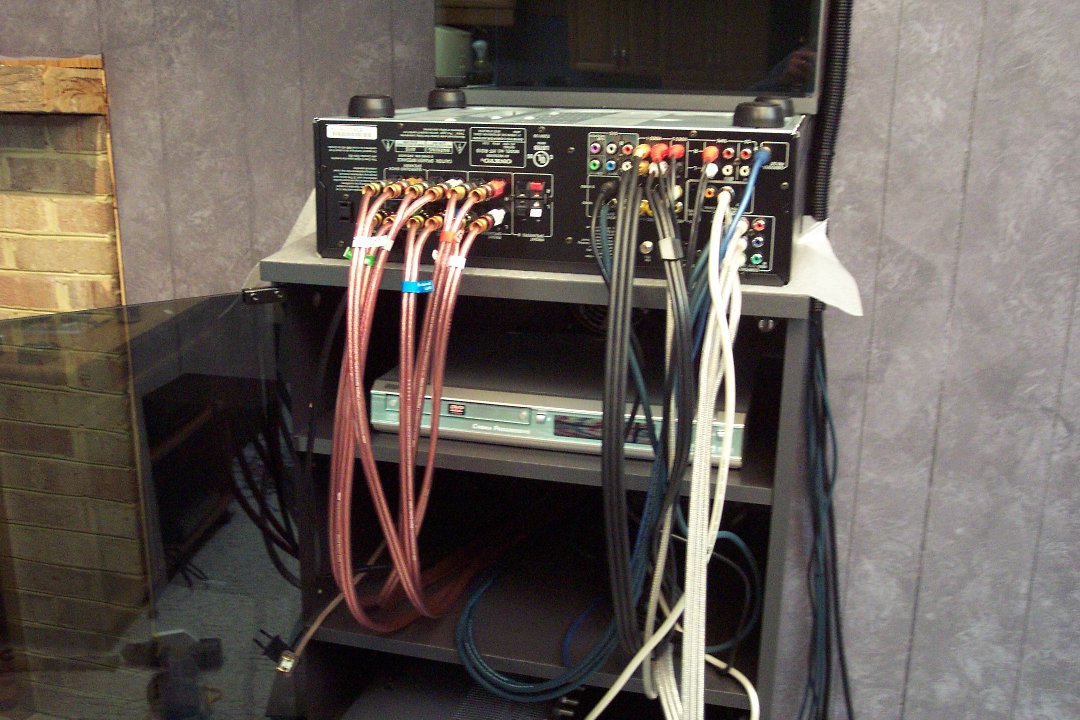
The budget aspect of this project put some definite limits on what could be bought for the audio surround sound and video projectors. The surround sound system is an Onkyo HT-S760 (Black model). We got it from Circuit City for $523. The side and rear speakers have been rated by others as somewhat weak, but the front, center and sub-woofer are given decent marks. I figured I could always replace the side and rear speakers later if that is the case. The A/V receiver (the Onkyo HT-R510) has tons of audio and video inputs and outputs, and I plan on using most of them. I didn't run all those cables for nothing. The easiest way for me to do this was to pull the cables through the equipment cabinet and to flip the A/V receiver upside down on the cabinet. Once everything was hooked up, it was easy enough to fish the cables back out of the back of cabinet.


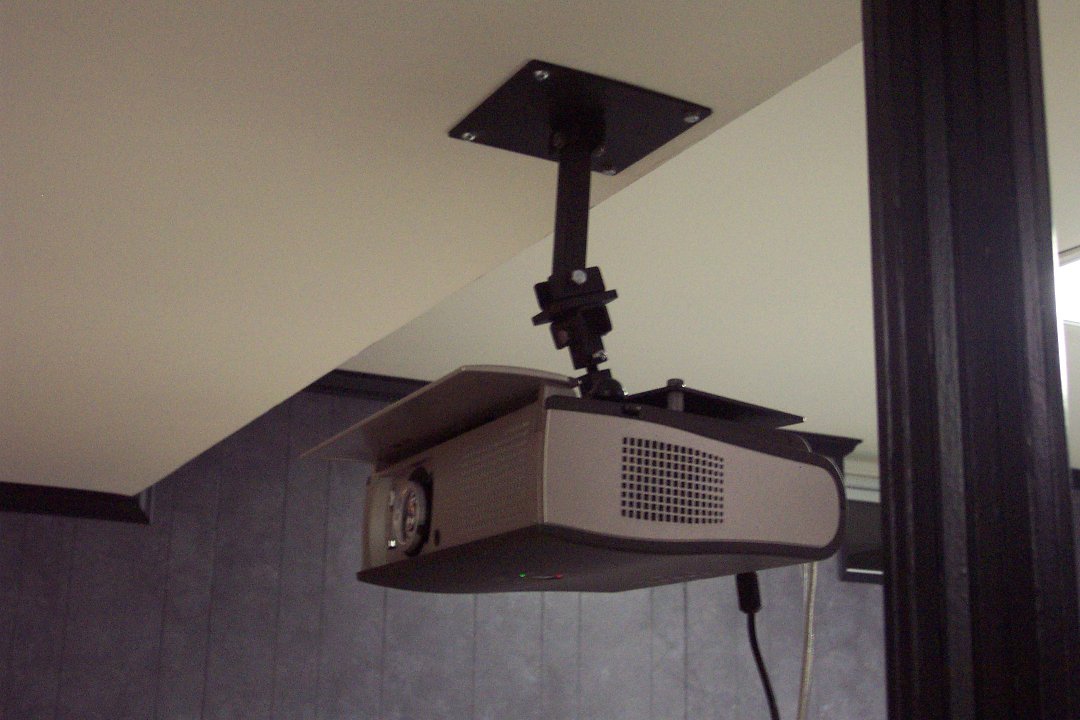
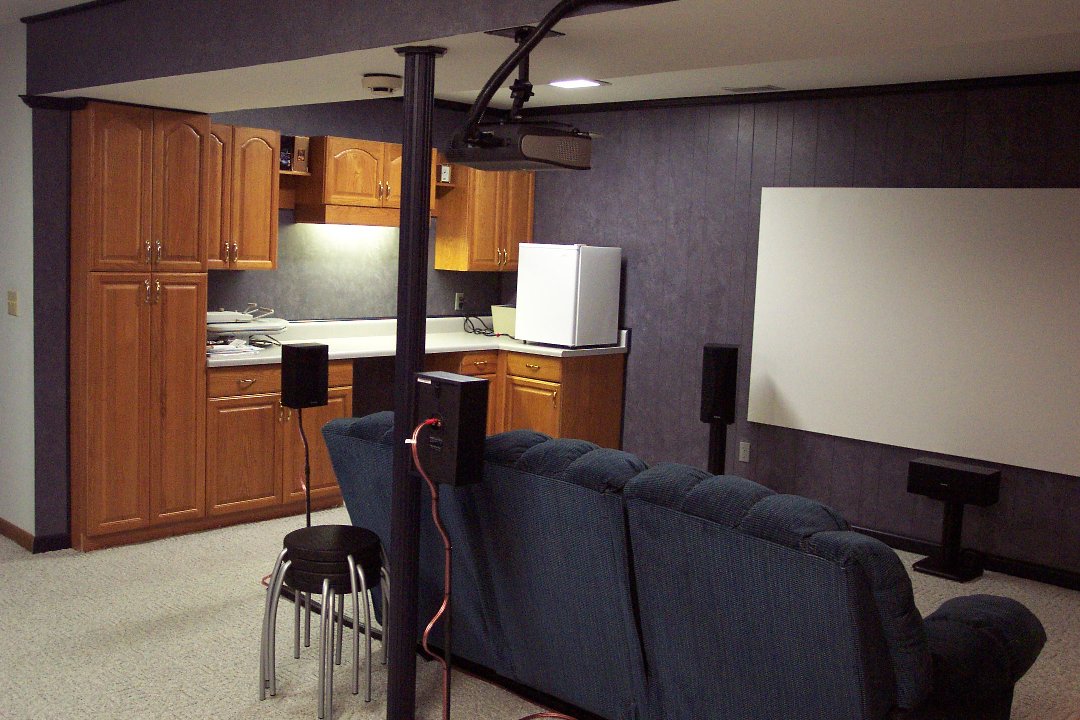
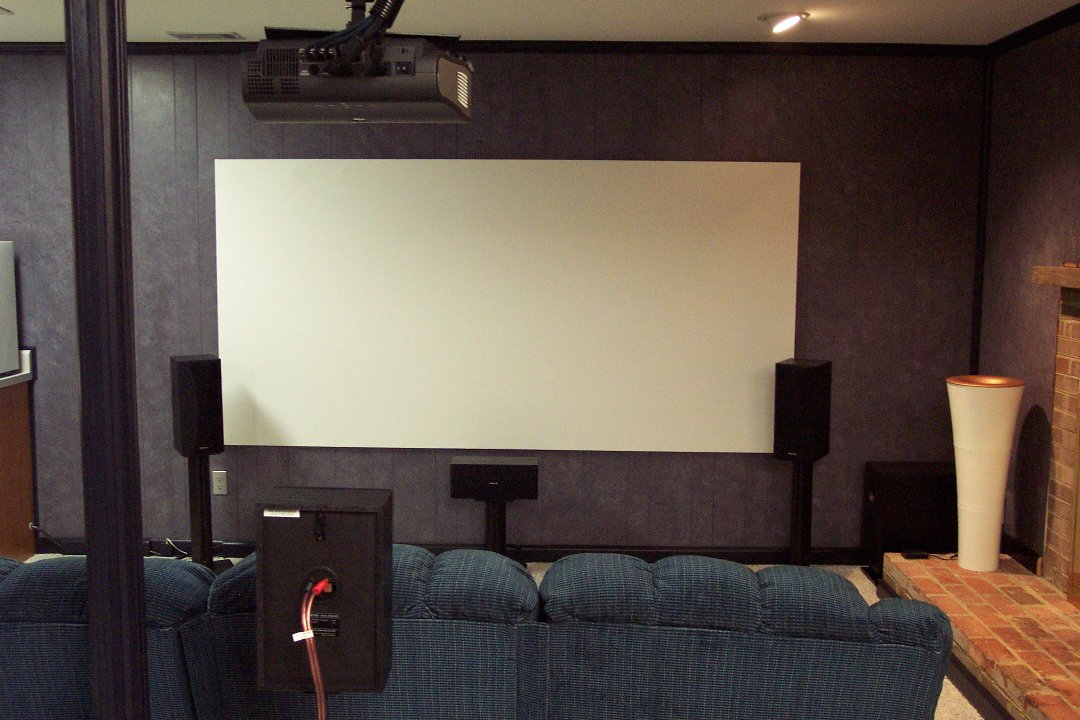
Turning our attention to the video projector, after weeks of scouring home theater sites and user forums, we decided on the Sanyo PLV-Z1. I purchased this projector from B&H Photo-Video for $1100. B&H also kicked in a Sanyo DVD-8000 DVD player (with surround sound). Our current DVD player was a bit iffy in this new setup, so the freebie was definitely welcome. The PLV-Z1 is a "1/4 HD" projector with an actual resolution of 964x544 (where 1/4 the pixel resolution of the full 1920x1080 HD size is really 960x540). It does a wonderful job of scaling HD content down because of this. One of the key selling points for me was the Z1's short throw lens. Because of the bulkhead in the middle of the room, it would be difficult to mount the projector much farther back from that. With the Z1 mounted as far back on that as possible on the bulkhead (which also bolted it into the main beam of the house), the distance was just about 11 feet to the screen. At that distance and with this lens, the picture was 110" diagonally. That'll do.
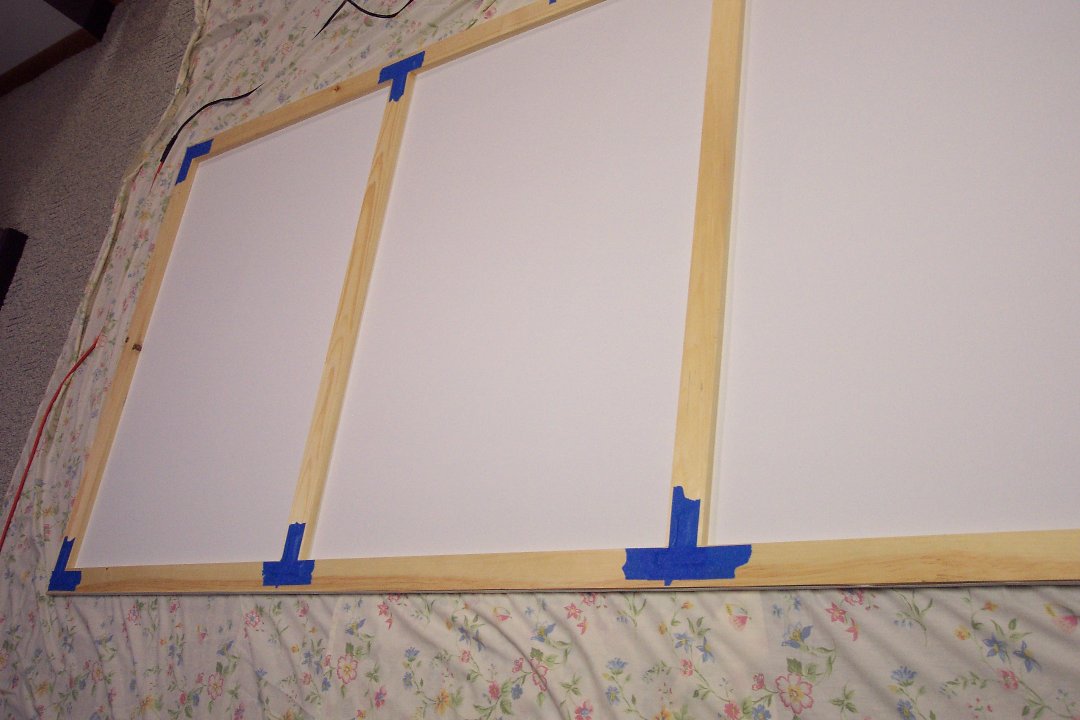
The projector wouldn't do much without a screen to project onto. Determining what screen to use took almost as much research as the other equipment. It's incredible how many choices there such as painting a wall with white paint, buying a cloth screen (of which there are 100s of varieties), painting the wall with special mixtures like "Mississippi Mud," painting the wall with a commercial screen coating like Screen Goo. I couldn't digest it all in the time I had, so I decided to make a cheap cloth screen as a starter. I figured that when I had time later, I'd figure it out. (A decade later, I never did. The fabric screen is more than good enough.)
For the temporary screen, we turned to Ebay and Home Depot. We bought a bolt of 54" wide white matte non-perforated screen material from Dazian Fabrics. I think the piece was 110" long. We bought a number of 1"x3" strips from Home Depot. We found that buying the more expensive type of wood (Maple?) gave us much sturdier and straighter pieces. Fastening those together with the appropriate L's and T's made a good frame to stretch the fabric over. We lapped the fabric just over the edge and stapled it in place with an electric staple gun. Use lots of staples and continue to stretch the fabric tight as you go along. As a final touch, we used black electrical tape to cover the staples on the edge of the frame. Altogether, this cost under $100, but it looks very good.

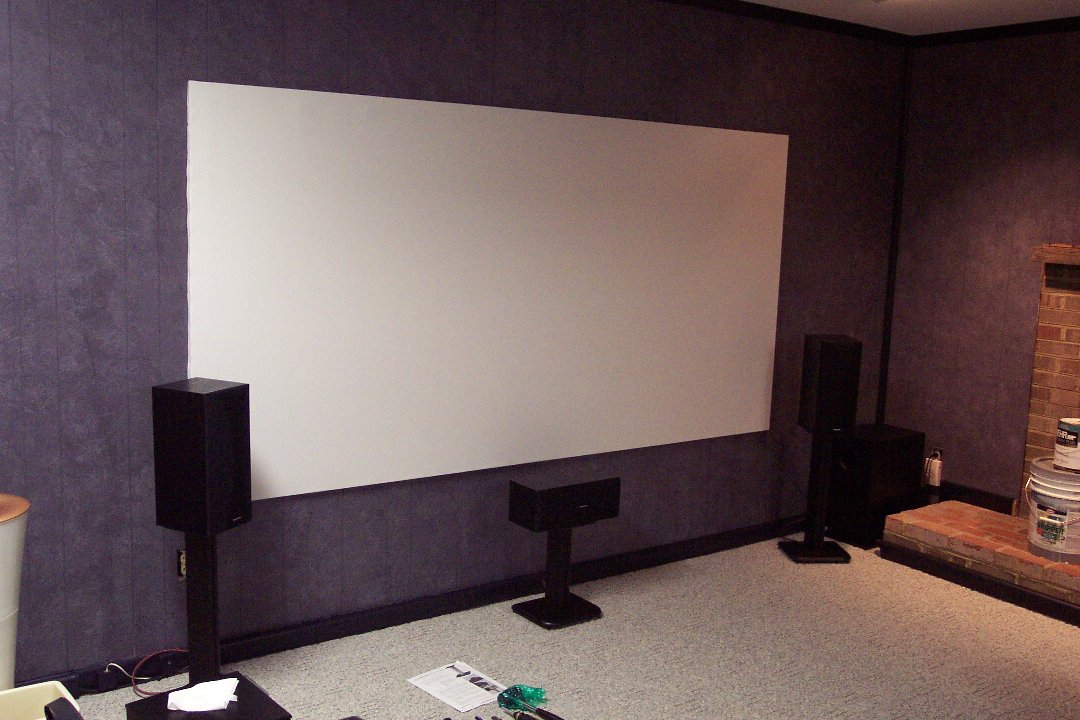
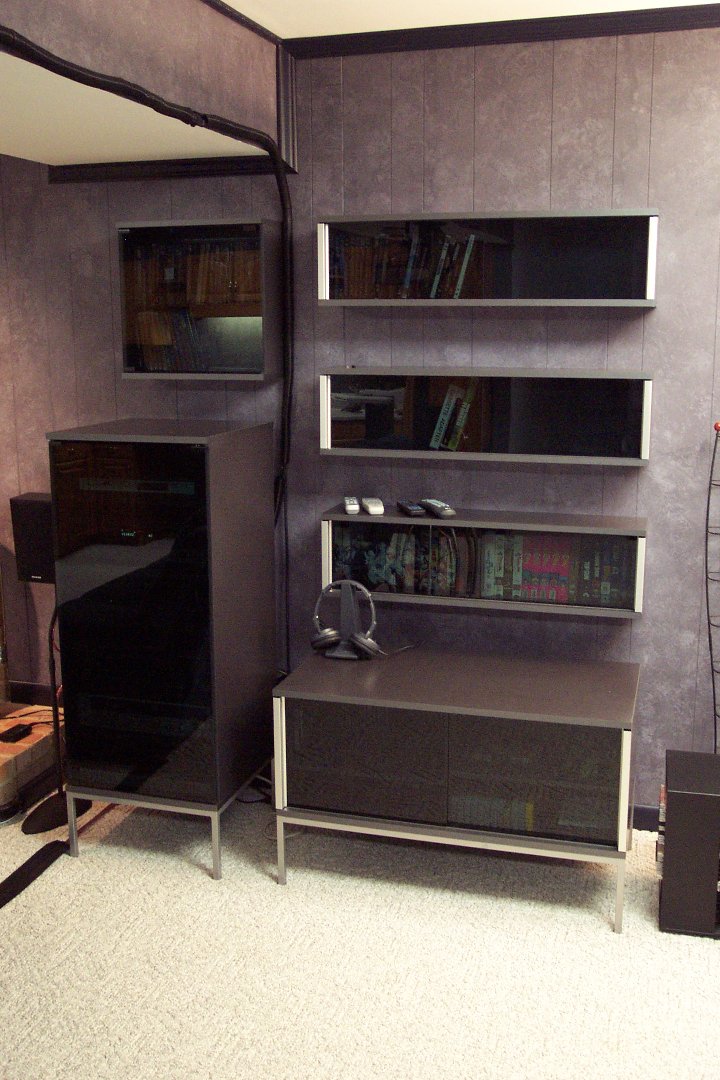
To quote Hannibal, leader of the A-Team, "I love it when a plan comes together." The sound system sounds good and the projector looks great on the homemade screen. To house the A/V equipment and provide storage for movies, game consoles and remotes, we purchased an equipment cabinet, several types of wall storage, and a floor unit (meant to hold a TV as an entertainment center) from Ikea. These were all from the Kaxås line, which just by happenstance, had a gunmetal gray version that matched the wall color perfectly. The fortunate thing about Ikea furniture is it's inexpensive. The bad thing about Ikea furniture is they drop and add models all the time. We went back later in the year to get some more of the DVD/CD storage cabinets, and they had closed out the line entirely. We've never found anything close ever again. Once we got everything put together and cleaned up the area, we had a very nice home theater for around $2,000.

We would be remiss if we didn't include a few pictures of the projector working. Unfortunately, our camera doesn't work all that well in the dark. We need to get a better camera. Next project maybe? The next step is to tune in all the colors and set up the audio balance. We already noticed that the projector favors green. At least, we've got some cool new toys!


Backups ... Just Do It!
Backups ... Just Do It!Backups ... Just Do It!
I have used a number of backup schemes over the years. In the not-too-distant past, most of them relied on some form of redundant, automatic backup such as RAID 1 (mirroring) or RAID 0 + 1 (striping plus mirroring). However, a while back, I decided that was not good enough and moved to a scheme of using software - in my case, CrashPlan (Plus) - to back up my desktop, my laptop, and my wife's laptop to a separate PC in my house just for that purpose. Additionally, I have CrashPlan back up the same machines (and my backup machine) off-site to their servers (called CrashPlan Central). The bottom line is that it's almost a requirement to have some form of active hard drive backup, and the good news is that it's not that hard.
The following is my personal experiences with computer storage over the last 30 years or so. Sadly, the necessity of having some backup scheme for my hard disks to guard against hard drive failure increased dramatically for me in the early 2000s. Originally, I would set up a RAID 1 array fully expecting to never replace either disk. The rare occasion when I did have to replace one justified the cost in my mind. I could be quite smug when I slapped in the new replacement disk, chose to rebuild the array, and lost nothing (save the time to rebuild and the cost of the new disk). That fact was that in the early days, the majority of RAID 1 arrays that I set up would go through their entire life with no failures. I know of a couple of systems in which I included a RAID 1 array that were 4-5 years old and still running on the original drives.
Unfortunately, that changed. By 2005 or so, I set up a RAID 1 array fully expecting it to be necessary. I'm not sure what happened with the hard disk manufacturer's, but reliability just took a dive. I suppose it could be me; I'm using twice as many hard drives in the systems I build, so it follows I would see twice as many failures. I believe, however, that's not entirely the cause. As I mentioned above, my early RAID 1 arrays, for the most part, ran their entire life without any replacements. In the last few years, more than half of the RAID 1 arrays I've set up have required at least one disk replacement.
This trend doesn't seem to be limited to a particular manufacturer either. I typically use Seagate or Western Digital (WD), but I have occasionally used Samsung and IBM (now Hitachi) drives as well. I don't use the latter two often enough to include those two in the following statement: In my opinion, no hard drives can be trusted. It seems to be Seagate's opinion, too, as they first reduced their warranty from five years to three, and now that warranty is down to two years on standard models. WD has three years on most drives with their premium models at five. What that should mean to anyone with a drive older than three to five years is that it should be expected to fail at any time.
For a long, long time I was an utter Seagate fanboi; it's the only brand of hard drive I would use in builds. When I first started using RAID 1 arrays, WD had a couple of embarrassing manufacturing issues, which they initially denied and eventually acknowledged. I myself wouldn't touch the things. In 2006 or 2007, I built myself a new desktop PC with a RAID 1 array using a pair of Seagate 120GB drives. One of the drives failed fairly quickly. Because I had used so many of their drives over the years with no failures, I figured it was just my time to get a bad one and replaced the drive. Then the other drive failed within a year. Both were covered by the (then five-year) warranty, but that's not the point. Had I not used a RAID 1 (mirroring) setup, data would have been lost. I didn't feel I could trust that particular model and tried my luck with a larger 250GB Seagate. One of those failed just under two years later. Like the others, it was still in warranty, but this was not what I expected from Seagate. RAID 1 was saving the day again and again, but I really wished it wouldn't have had to.
I had a similar experience in a desktop PC I built for my daughter to take to college. One of the 250 GB Seagate drives (in RAID 1) failed after less than two years. During this same time, the company I worked for bought three WD250 GB external USB drives for a few of us working offsite to use for backing up our laptops. All three died; mine lasted the longest - almost two years. In my opinion, all hard drives should be regarded with the belief that they will fail before they are out of warranty, so having a backup is absolutely required. Sometime during all of this, I decided to use RAID 0 + 1 in my gaming desktop. That required I add another pair of Seagate 250GB drives in order to effectively get 500 GB of space. Of the four drives in use, I had three failures including one where the replacement for a failed drive also failed. I switched to using Western Digital Black drives, which had (and still have) a five-year warranty.
I now use SSDs (solid-state drives) as my main boot and file drives. Their cost is low enough to be viable replacements for HDDs (standard hard disk drives), but still high enough that doubling the number of drives needed (as used in RAID 1 mirroring) is prohibitive. I also have a pair of WD Scorpio Black drives, which have a five-year warranty. Still, I don't have enough faith in any of them not to have a complete backup elsewhere. That is where CrashPlan comes in. In the rest of this article, I'll go through the ways I have (and you can) backup your hard disks.
Hopefully, I made a convincing case above that hard drive backup is absolutely essential. It was always a good idea, but with what I'm seeing as the current state of hard drive reliability, it's no longer an option. There are lots of effective ways of maintaining a backup. In the links below, I will go into a number of them that I have used.
RAID 1 - Disk Mirroring
RAID 1 - Disk MirroringRAID 1, for those who don't know, uses a pair of disks whereby anything written to one disk is also written (i.e., mirrored) in parallel to the other. I used RAID 1 in desktop builds - both for gaming and business use - for over a decade with very good results. On RAID 1's minus side, half the disk space is lost since, for example, two 500GB drives appear as only one 500GB drive. Also, the writes don't occur completely in parallel and the two drives require synchronization to ensure that everything was faithfully copied to both drives. This slows the write speed of a RAID 1 array down to being a bit slower than writing to a single disk.
On the plus side, is that in the event either one of the two disks fails, no data is lost. That's the big plus that saved me from data loss a number of times. Also, when reading files from disk, the RAID 1 array can read alternate blocks of a file from both drives simultaneously to nearly double the read speed. (This is similar to how RAID 0 striping works all the time. See below.) In a gaming system, significantly more time is spent reading from the disks than writing, so RAID 0 gave me a noticeable increase in speed when booting, loading games initially, switching maps/level, etc. When and if a disk fails, that boost in read performance (and the security on having a constant backup) is lost until a replacement is installed and the files are copied from the remaining drive to the new drive. (This is called rebuilding the RAID array, and while this is in progress, it's a very good idea not to use the system. It's going to be really slow anyway, so just give it the necessary time to finish.)
A RAID 1 array can be built as a "hardware" or "software" array. Hardware arrays are those that use a motherboard with a chipset that supports RAID. Most current motherboards, even lower-end ones, support some form of hardware RAID. Sometimes, it's only RAID 0 and 1. (More on RAID 0 in a bit.) Optionally, we can buy a RAID controller add-in card to create a hardware RAID 1 array. The higher-priced add-in cards are often faster than the RAID solutions found on motherboards, so it's a good alternative. Windows 7, Windows 8 and Windows 8.1 also support creating RAID arrays though the operating system software. I personally have not used a software RAID, and it wasn't clear from what I read if a software RAID can be used as the boot drive. I know a hardware RAID array can be the boot drive as that's pretty much the only way I have done it.
The second thing we need is a matched pair of disks. Technically, the disks don't have to be the same, but it's more efficient if they are. If a 1.5 TB drive is paired with a 2 TB drive, the resulting RAID 1 array will be 1.5 TB with the extra 500GB of space on the 2 TB drive wasted. If the two drives have significantly different write times, the effective write time is that of the slower drive (plus the overhead for synchronization). This would waste the potential speed of the (presumably more expensive) faster drive. Typically, I just get a matched pair of drives from the outset. That said, it's a good idea to get each drive from a different source. That way, if the vendor happened to be the unlucky recipient of a bad batch of drives, the system we build with them won't inherit all the same bad luck.
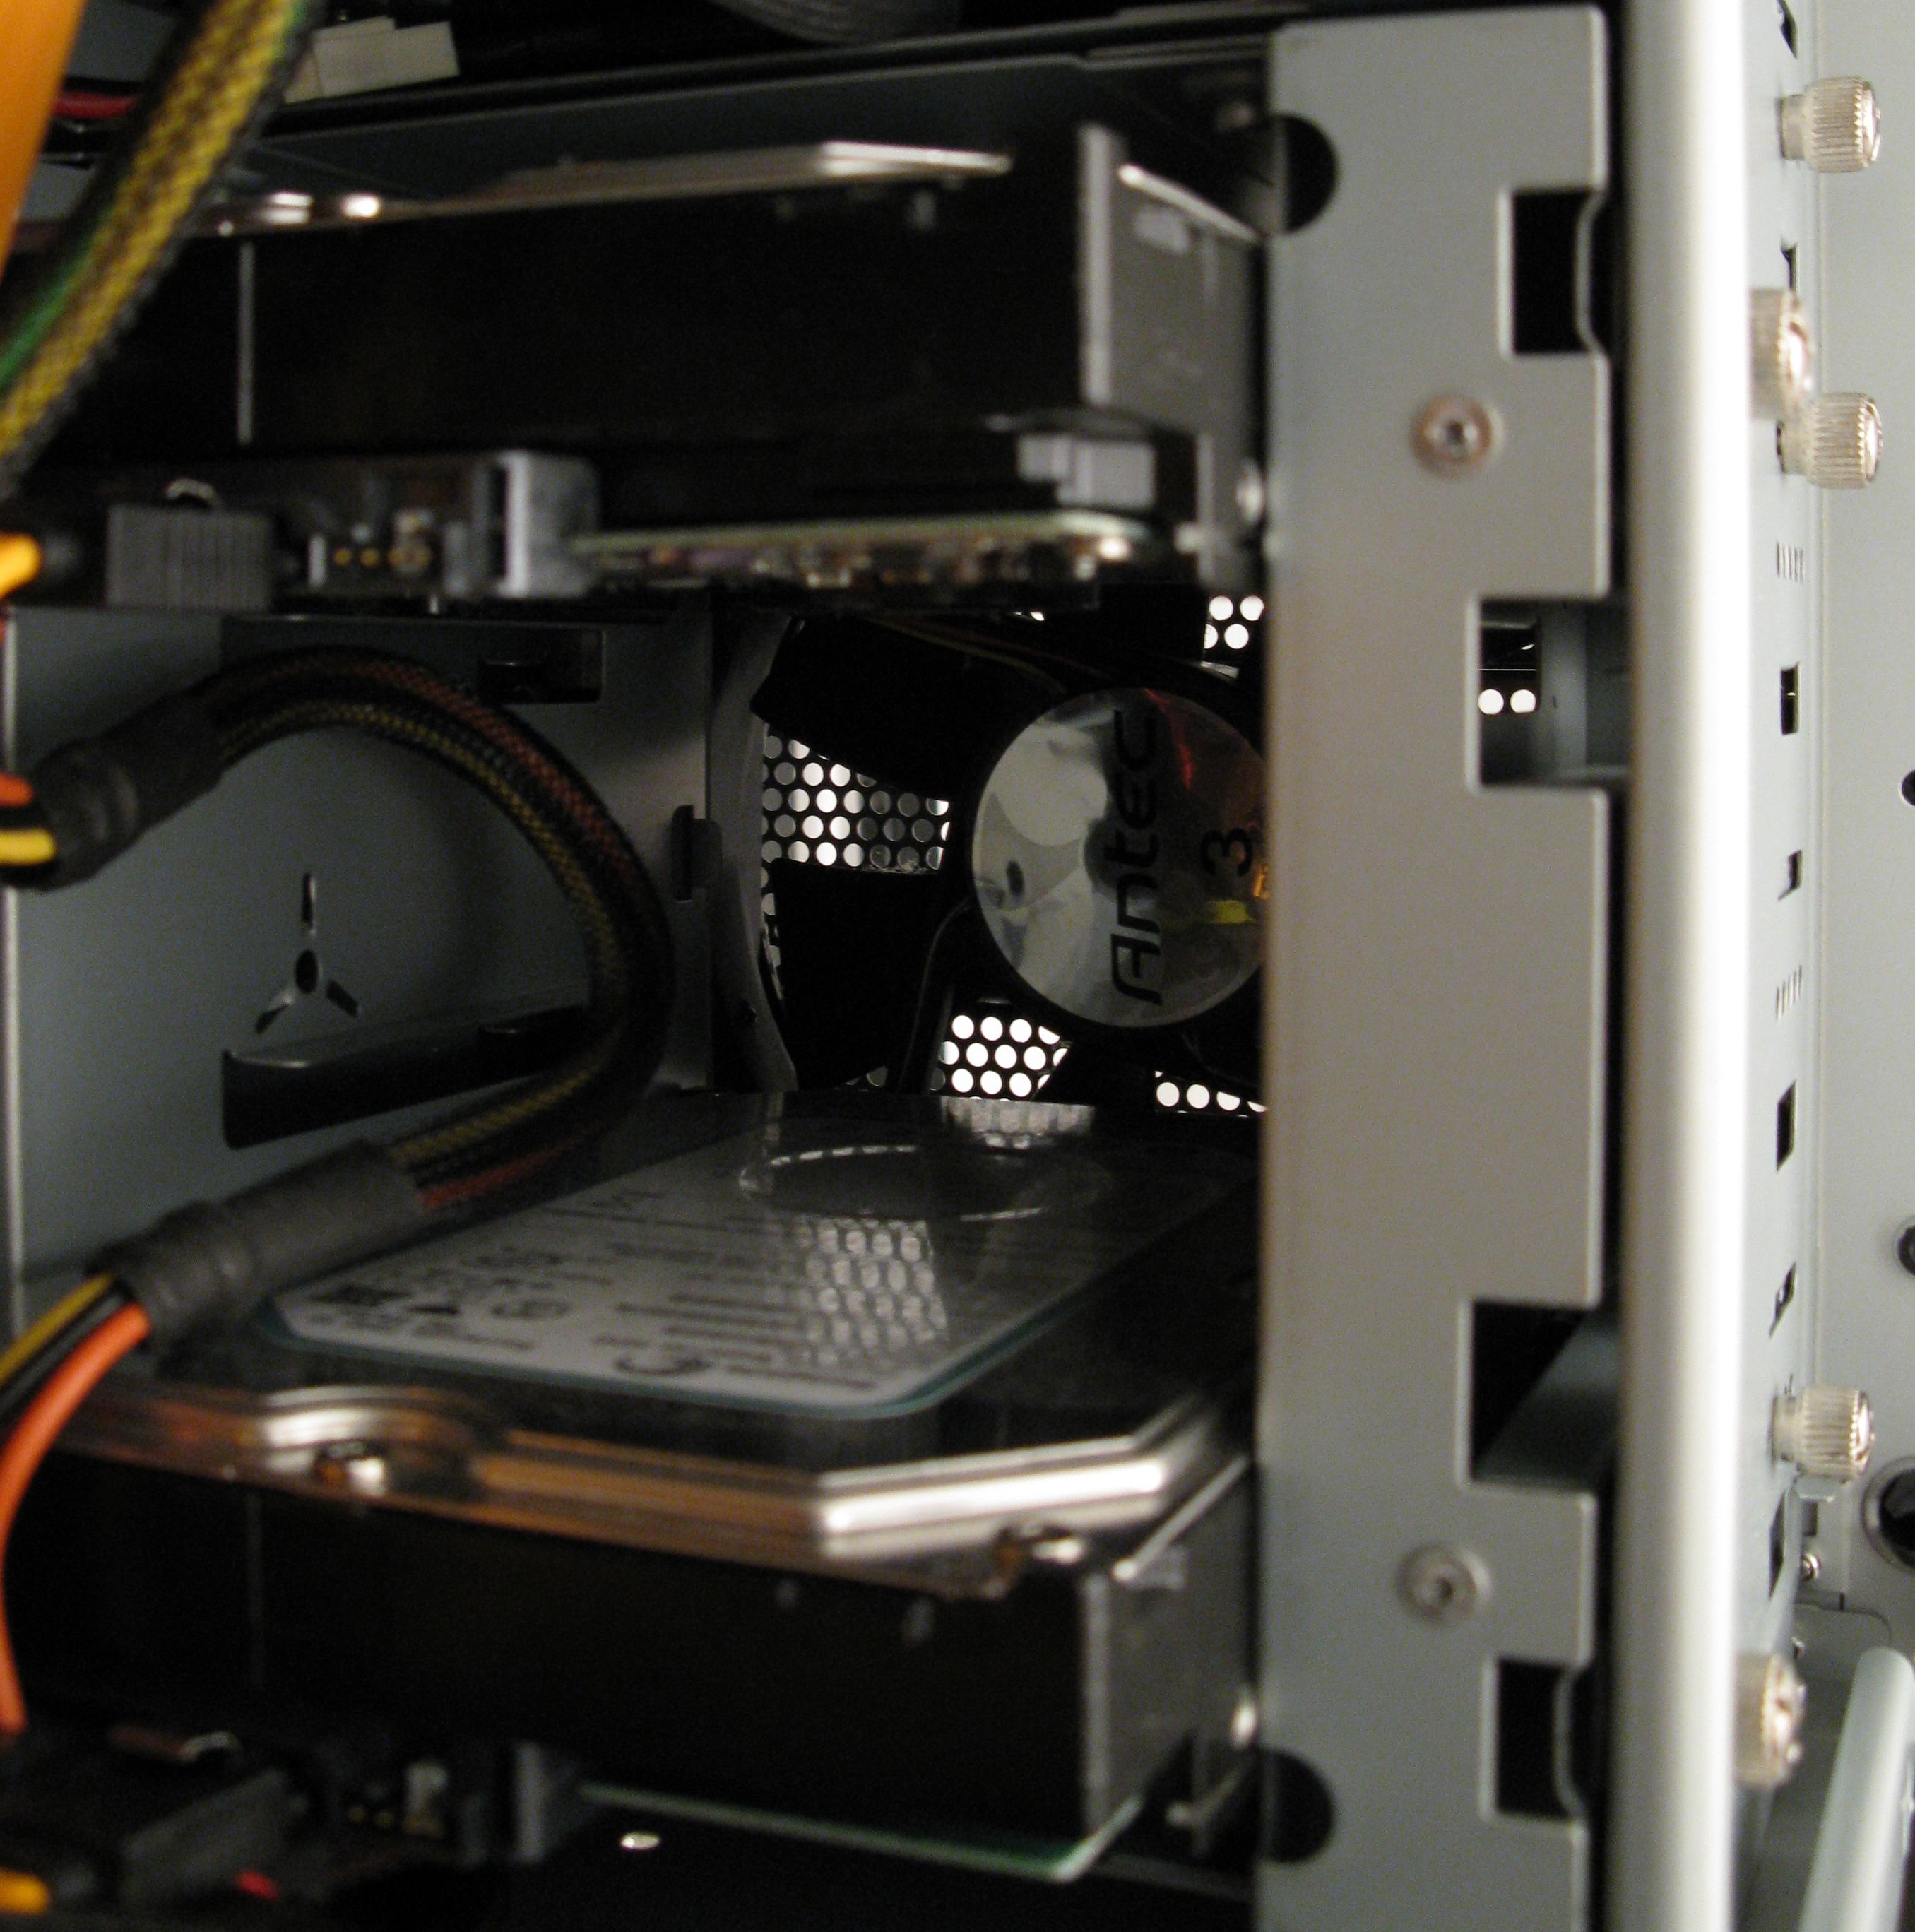
When installing the disks, it is best to leave airspace between the drives if possible. If the drive cage has a fan that moves air across the drives, that's even better. The power and data cables should be kept out of the way as much as possible. The picture below shows a pair of drives with a fan in front of them that draws cool air in from the front of the case. (The case is an Antec Nine Hundred.)
Setting up a hardware RAID array varies by motherboard, but the basics tend to be the same. Rather than write my own instructions here, I'll just point to one of the many references I found on the subject at PCWorld. Really, the main trick for setting up a hardware RAID in Windows is having the correct drivers onhand (on a USB stick, CD or DVD) during the Windows installation process. For an example of setting up a software RAID array, this article at Overclockers seems to be pretty complete. It's not something I have done, myself.
Although RAID 1 has saved my hide on a number of occasions, it's only part of a good backup scheme. For example, RAID 1 won't protect against accidental deletion of (irreplaceable) files. Nor does it protect against viruses. Therefore, it's still a good idea to perform a periodic backup of critical files to CD-Rs, DVD-Rs, an external disk, a spare internal disk, another computer, a network file server or a backup server on the Internet. This need not be a backup of everything on the disk (like RAID 1 does), but it should be those documents, audio files, pictures, and movies that you yourself have created and would not be able to replace. Several of the following sections talk about these alternatives.
RAID 0 (Striping) Plus a Backup Drive
RAID 0 (Striping) Plus a Backup DriveRAID 0 is the preferred hard disk solution for the fastest disk access possible and is very popular in gaming desktops (and some laptops). With RAID 0, files over a certain size - called the stripe size - are broken into "stripes" and the stripes are written to alternating disks. Generally, the number of hard disks in a RAID 0 array is two, but it can be more. If it is two, the first stripe-sized block of a file is written to one disk and the second is written to the second disk. The third stripe is written to the first disk, and so on. The stripes can be fed to the two disks in parallel nearly doubling both their read and write speed.
The first and major plus as mentioned is the greatly improved read and write speed. Also on the plus side, unlike with RAID 1, no disk space is lost in RAID 0. Two 2 TB drives would appear as a single 4 TB drive. On RAID 0's minus side, if either disk fails, all files over the stripe size are effectively lost since half of a file (assuming a two disk raid) is little better than no file. One way to resolve this problem is to have a third non-RAID disk that matches the size of the RAID 0 array (or larger). This drive will be used to contain one or more backups of the RAID 0 array. Some form of backup software such as Acronis True Image Home 2015 would then be installed and configured to perform backups on a regular - typically nightly - basis.
Acronis True Image has a feature named Acronis Nonstop Backup that automatically creates incremental backups of files and folders (or even partitions) every five minutes allowing users to roll back their system, files, and folders to a point in time in the past. While this sounds good, it may well defeat the purpose of a RAID 0 drive or at least reduce it. There would need to be some sort of synchronization or checking of the backup in real-time that would slow down the RAID array. Since it's incremental, it may not be much in reality. Acronis also has a powerful scheduler to make the backup at some time when you are not on the computer. This would not interfere with the computer while it's in use, but the risk is losing any data created since the last backup is run.
Acronis is not the only backup program to consider. Macrium (Reflect) and Paragon (Hard Disk Manager) are also quite popular. At various times, various releases of one or the other products have had issues. I currently use CrashPlan, which could be used for a backup scheme like the one above, but it really meant for backing up one computer's files to another (which could be a local PC, a friend's PC over the Internet, or even CrashPlan's own servers).
From a build point of view, for hardware RAID, we need a motherboard that supports RAID or we need to buy a RAID controller add-in card as before. For software RAID, we need an operating system that supports that feature (also as for RAID 1). The second thing we need is a matched pair of disks and a third disk that's approximately the size of the RAID array. The disks to be used in the array don't have to be the same, but the array is generally more stable if they are. If a 1 TB drive is paired with a 1.5 TB drive, the resulting RAID 0 array will be twice the size of the 1 TB drive or 2 TB with the 500 GB of extra space on the 1.5 TB drive wasted. If the two drives have significantly different write times, the effective write time is that of the slower drive. This would waste the potential speed of the (presumably more expensive) faster drive.
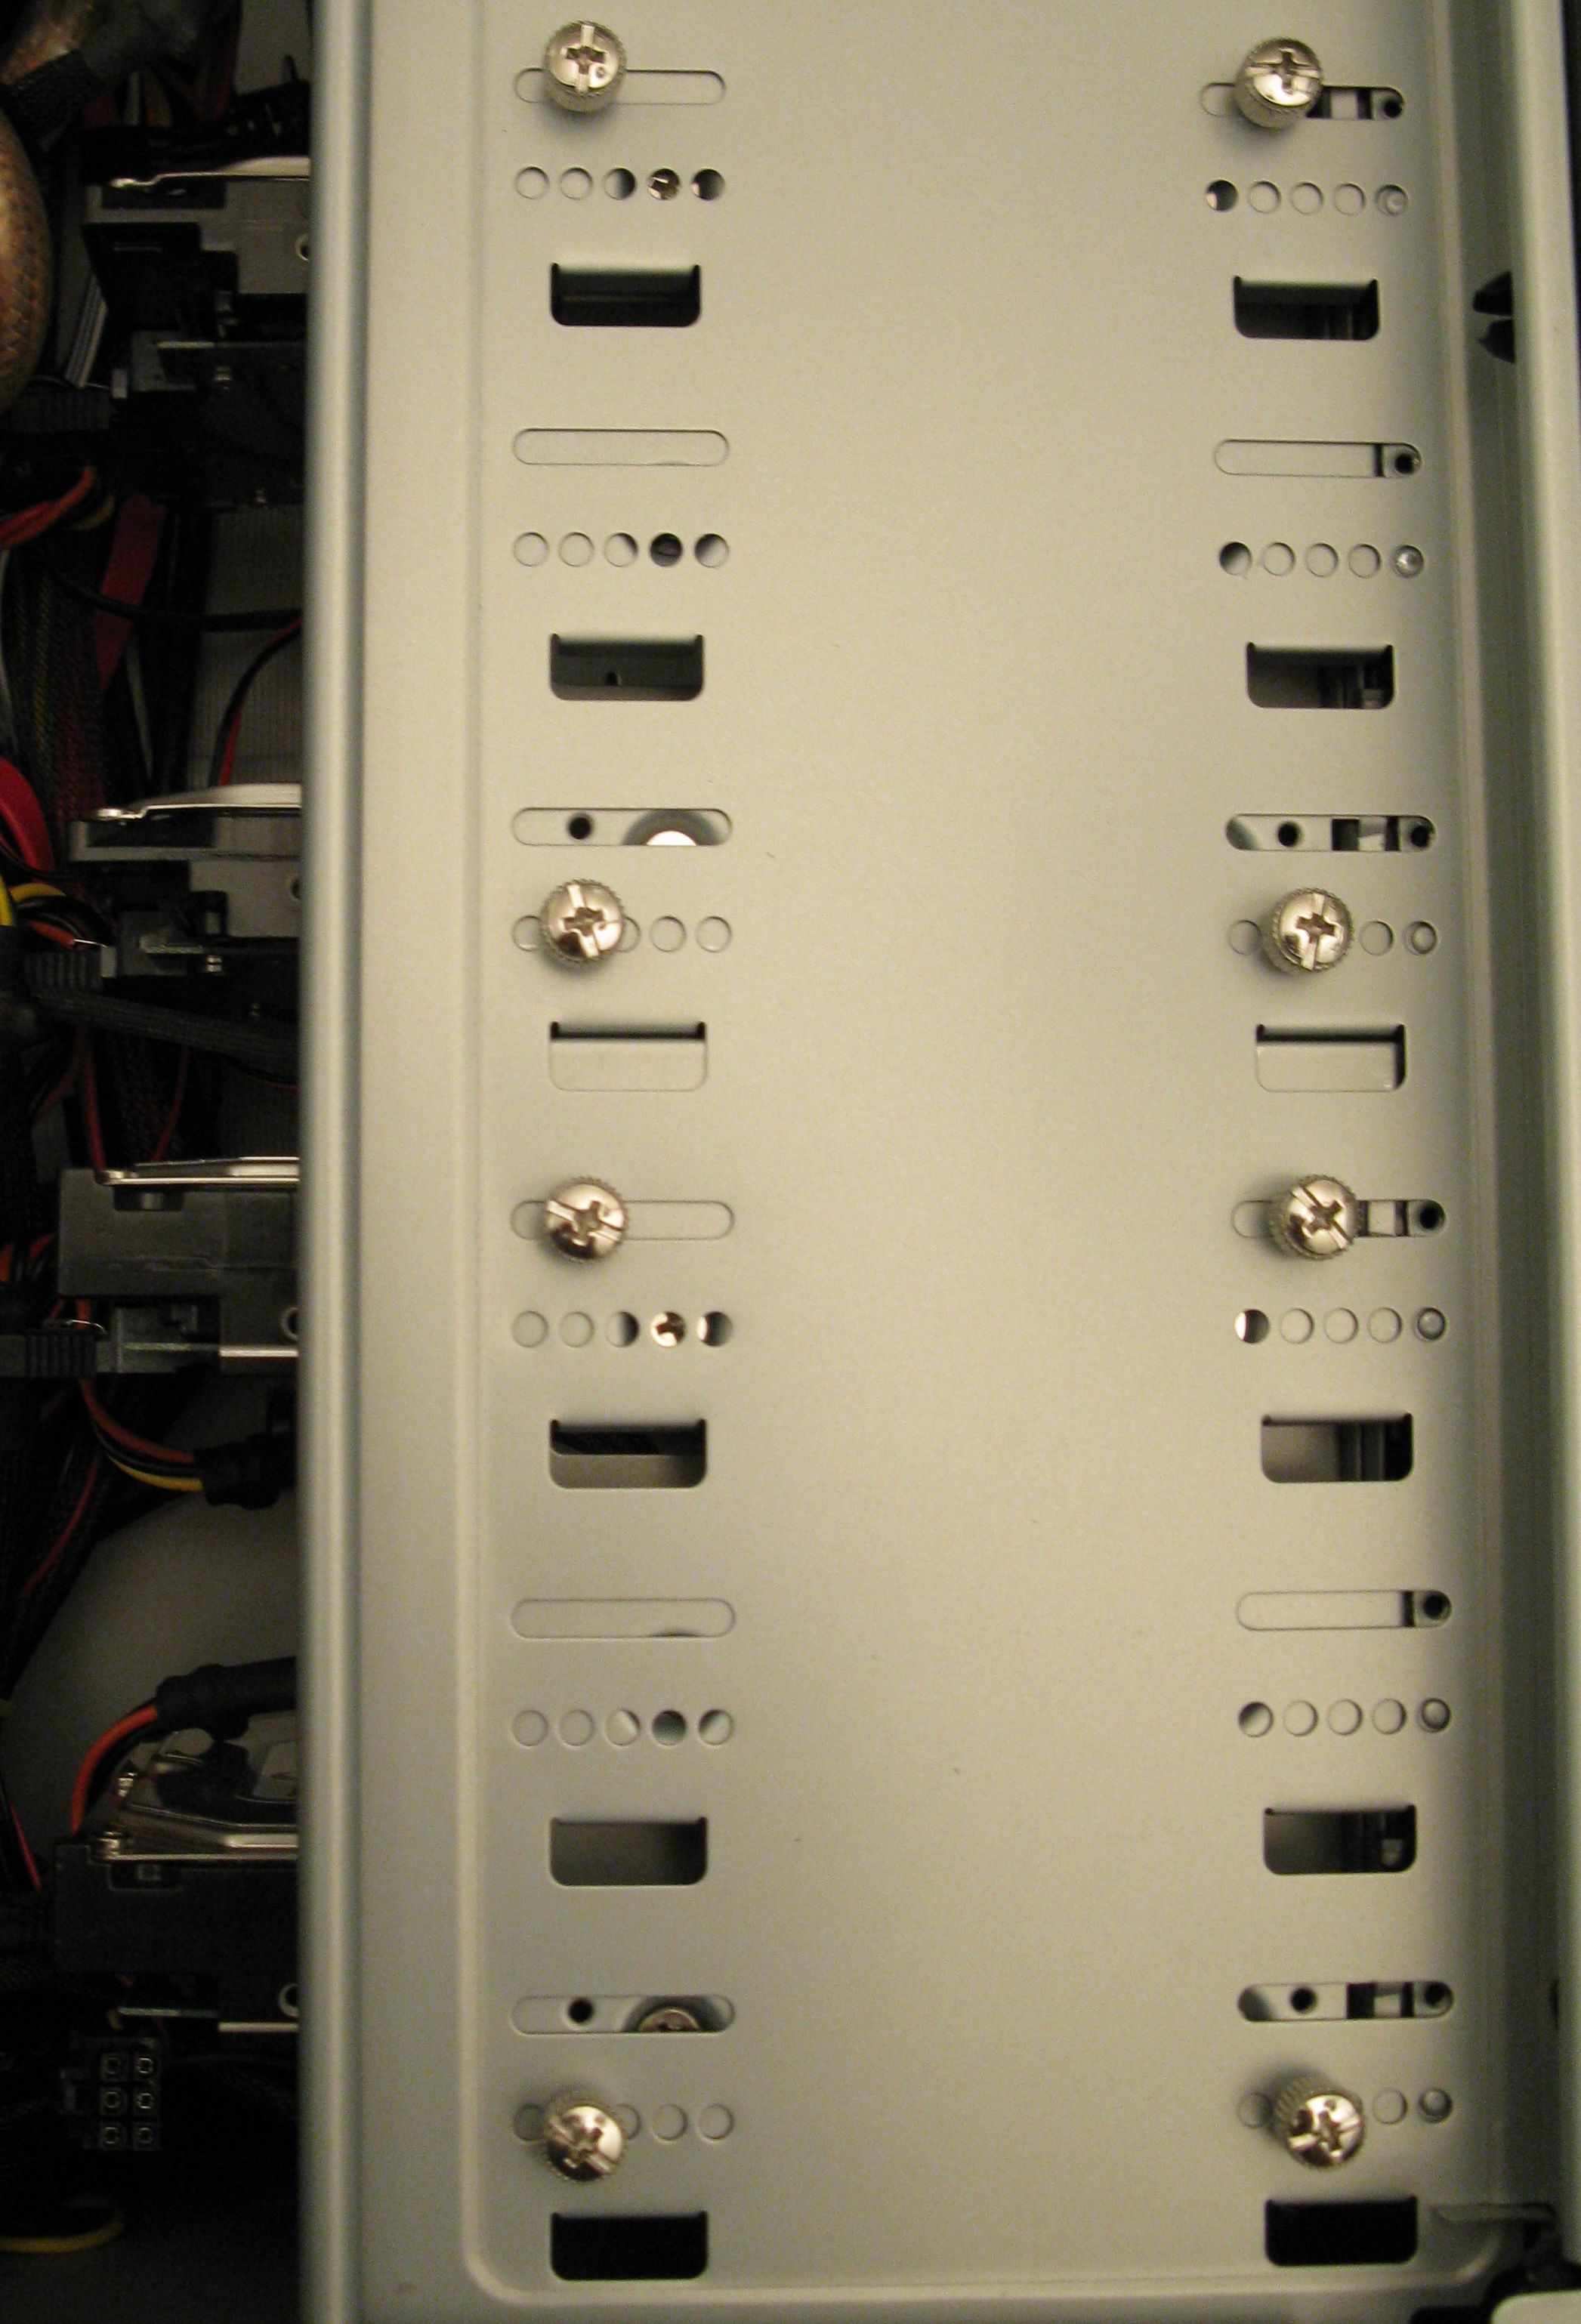
As for the backup drive, it may either be external or internal. If using an external, try to use USB 3.0 (or above) or an eSATA connection. Disks are installed using the same rules of thumb as with RAID 1. Leave airspace between the drives if possible and use or install fans for the drive cage, if possible. The power and data cables should be kept out of the way if possible. The picture below shows a pair of drives used for RAID 0 and a third, larger drive used for backup. (The case is an Antec Nine Hundred.)

As before, rather than giving instructions for setting up a RAID system here, please refer to the list of guides found on the Internet such as those listed in the first section.
RAID 10 (1+0) - Mirroring and Striping
RAID 10 (1+0) - Mirroring and StripingIn the RAID 1 (mirroring) discussion, it was mentioned that the write speed of such an array is slightly slower than writing to a single disk. On the other hand, RAID 0 yields a write speed that is nearly double that of a single disk (because it involves writing simultaneously to two disks). What would be ideal is to have the continuous backup that RAID 1 affords while somehow keeping the write speed of a RAID 0 array.
Somewhere along the line, somebody realized that if we had a pair of identical RAID 1 arrays, we could write to those using the striping technique of RAID 0 and let the RAID array perform the mirroring as time permits. This is the essence of the solution provided by RAID 1+0, which is also known as RAID 10. It is almost always written as RAID 10. Essentially a pair of RAID 1 arrays is used in a RAID 0 array, which makes it a stripe of mirrors. This gives us (nearly) the speed of a RAID 0 array with the data redundancy and security of a RAID 1 array. A RAID 10 array requires (a minimum of) four hard disks and like a RAID 1 array, only half the total disk space is accessible. However, the write speed to that array is essentially the same as that of a RAID 0 array. Even better, the read speed is double that of a RAID 0 array. For a gaming system, which tends to do a lot of burst reading (when switching levels or areas for example), this can make quite a difference.
The first and major plus of RAID 10, which was already mentioned, is the combination of the advantages of RAID 0 speed and RAID 1 security. If any single disk fails, no data is lost. The failed disk can be replaced and the RAID rebuilt from the remaining disks. In theory, two drives can fail so long as they do not both contain the same mirrored stripe. In general, we are trying to guard against single disk failure while maintaining RAID 0 (or better) performance.
From a build point of view, we need the motherboard support for RAID 10 or an add-in card that supports RAID 10. This time, however, we need a set of four matched disks. The same caveats about disk size and speed apply as in RAID 0 and RAID 1. One additional factor in the mix is that you need a case that holds four internal hard disks and still has decent airflow. Leave airspace between the drives if possible and use or install fans for the drive cage, if possible. The power and data cables should be kept out of the way. The picture below shows four drives in RAID 10.
Note that I did not talk about software RAID in the last paragraph. As far as I can tell, Windows 7 does not support RAID 10 directly, so a hardware RAID is the only option. Windows 8 and Windows 8.1 support a newer concept called Storage Spaces. Storage Spaces don't provide an exact equivalent to RAID 10, although they do have support configurations with similar goals. However, that's not something I have used (and a bit beyond the scope I was trying to cover here).
Also, note that I only discussed RAID 10 and not RAID 01 (also known as RAID 0+1). While RAID 10 is known as a stripe of mirrors, RAID 01 is known as a mirror of stripes. Most motherboards only support RAID 10 and not RAID 01. RAID 10 and RAID 01 require the same resources and yield the same performance benefits. The devil in the details is more involved than I want to get into here, but suffice it to say that RAID 10 is inherently more stable than RAID 01 when a drive failure occurs. A good article on why this is so can be found at The Geek Stuff.
As before, rather than giving instructions for setting up a RAID system here, please refer to the list of guides found on the Internet such as those listed in the first section.
My Current Backup Approach
My Current Backup ApproachAlthough I have used RAID 1 and RAID 10 in the past - even occasionally RAID 0, I am not currently using any of those approaches to maintain my backups. In fact, I don't even have a RAID setup in my current system even though it's perfectly capable of supporting one. I even have a pair of matched hard drives.
In my last several builds, I have switched from rotating hard disk drives (HDDs), to a combination of Solid State Drives (SSDs) and HDDs, and finally to just SSDs. In my current build, I'm using a pair of 2 TB NVMe SSDs that install directly on the motherboard. (The speeds on the two SSDs differ.) Even though the prices have come down dramatically, the cost of SSDs makes setting up a RAID a bit prohibitive. Instead, I have switched my desktop, a laptop, and a file server to using offsite backup over the Internet. I have used a couple of services to do that.
Nasty Note: 22 August 2017

CrashPlan has decided they no longer wish to service consumers. After five years of giving them more than I thought they were worth ... I am not pleased.
I very recently switched from CrashPlan Home (Family Plan) to IDrive. I didn't switch because I had any issues with CrashPlan. I switched because CrashPlan decided they no longer want to bother with consumers. Like CrashPlan, IDrive lets me pick the files and folders I want to back up. IDrive doesn't have unlimited storage as CrashPlan did. However, their $70/year plan - which is less than half what I was paying CrashPlan per year - includes up to 2TB of storage for an unlimited number of devices (where the list of devices includes iPhones and Android phones and tablets in addition to computers). That's considerably more space than I actually used with CrashPlan.
CrashPlan Home was available as both a free version and a subscription version. The free version of the software supported backing up to an external disk, another computer in your house or even a friend's computer. The free version did not support backing up to the Internet. With a yearly subscription on the CrashPlan for Home Family Plan, I could back up any 10 devices to both a local and CrashPlan's Internet-based servers (in parallel). None of the other online backup services (including IDrive) seems to support that parallel local/online backup. IDrive's (significantly more expensive) business plans offer Hybrid backup, which does support both.
IDrive allows anyone to create a free, small (5GB limit) online backup using their software. It also seems to support creating a local backup to an external or network drive (I haven't tried it.) IDrive does let me use my own encryption key and has 256-bit AES encryption. I can get at my backed-up files from anywhere (so long as I have the key with me). IDrive keeps files backed up to it forever or until cleaned up (i.e., manually deleted, but it has tools to help with that) and keeps the last 10 updates to any file. I'm not sure how IDrive tallies up disk usage, so it remains to be seen if this will become an issue or not.
Since the very first backup(s) can take excruciatingly long over slower Internet connections if the amount of data is moderately large, so IDrive offers IDrive Express that allows the user to use the IDrive software to backup to an external drive (which IDrive supplies). After that backup completes, the user ships the drive to IDrive (IDrive pays for the shipping), and they load the data onto their servers. This is known as a Seeded Backup. From that point, the users only need to do incremental backups. IDrive customers can use this service to bulk upload their data once per year for free. It's $60 for additional uploads. IDrive also supports loading backed-up data onto an external drive from their servers and shipping that to you in the event of a major loss of data. That costs $100 for each request. (CrashPlan originally offered the same services for home users but discontinued them.)