Additional Configuration
Additional Configuration for Internet Connection Sharing
You may have noticed earlier when we were configuring your router for your LAN connections, that there was a whole slew of settings we completely ignored. A number of those have to do with your wide area network (WAN) or Internet connection to your ISP. We didn't need to set them while we were concerned only with setting up the LAN, but now is the time. As with the previous sections, this section will attempt to teach by example. If you've made it this far, you're almost there.
Configuring Your External Internet IP Address
Most Internet Service Providers offer similar options to those you had to choose from for assigning the IP addresses for your LAN: dynamic IP address assignment using DHCP or static (fixed) IP assignment. (See Using DHCP IP Address Assignment for Automatic Configuration and Fixed/Static IP (Manual IP) Assignment, respectively.) Think about it this way, you are acting as an ISP providing Internet service for the networked devices inside of your home much as your ISP is providing service to your home. Many of the same procedures you used to set up your LAN are similar to what your ISP does for its customers but on a larger scale. Most ISPs offer dynamic IP (DHCP) service as their basic package - charging at least slightly more for static IP address accounts if they offer static IP addresses at all. Often, static IP addresses are offered only as "business" packages. Unless you are planning on running some type of services such as a web server or permanent game host server (again making sure that your service agreement give you the right to do so), dynamic IP service is fine for most home networks.
Connecting to Your ISP Using Dynamic IP Addressing
We'll start by assuming your Internet service is dynamic and uses your ISP's DHCP server to get the external IP address for your router. One thing that you might find a bit mind bending is that at the same time that your router is the DHCP server for the devices attached your internal home network (LAN), it is also a DHCP client to your ISP's DHCP server in order to obtain an IP address it can use to connect to the Internet. It can do both, and it won't get confused. Are you? Dynamic service from an ISP is so common that most routers are set up to work with it from the start. You may find that you are already connecting to the Internet at this point. It's still a good idea to go through the steps here and look at what the normal settings are.
As before, the first step in configuring the router is to log on to it. Do this by browsing your router's LAN address. For this exercise, I've set the router's LAN IP address to 192.168.4.1. All the LAN devices, therefore, are on the 192.168.4.0 network. If your router is still set to the factory default, browse to that IP address instead. You will need to make sure that the IP address of the Ethernet adapter on the machine you are browsing from is also on the same network. (In our example, that means it has an IP address beginning with 192.168.4.) If your router has DHCP enabled on the LAN by default, which most do, you will be given a valid IP address by the DHCP server. If not, you will need to manually set the IP address of the Ethernet adapter. You can check if you have a valid IP using Test 4: Checking for Valid IP Address. Browsing to the router's configuration main page is shown below. Your router's page will likely look different.
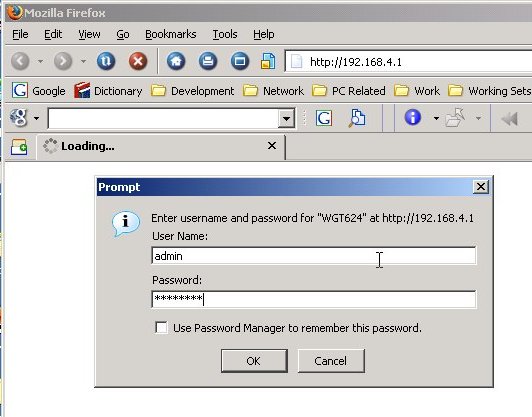
Login to the router with the password you set earlier. That will bring up the first configuration page, which for our example router looks like the following. (Your router may have a different first page. You need to find the page that lets you set the WAN or Internet IP configuration.)
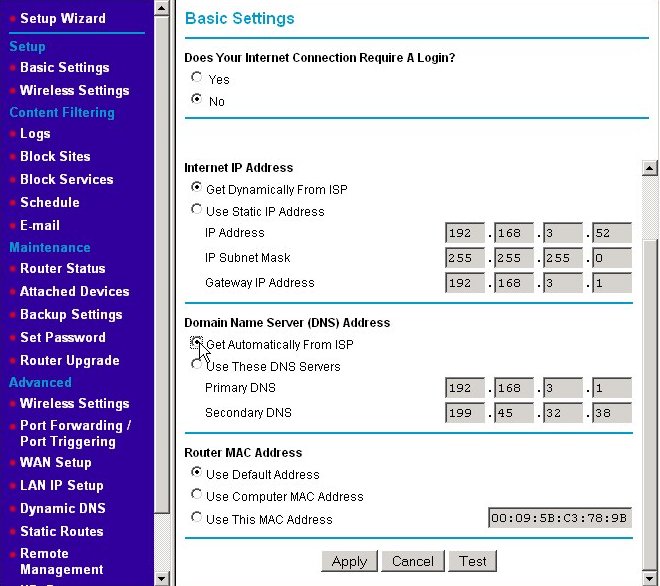
If they are not already selected, click on the radio buttons for getting your Internet IP address automatically from your ISP. This means your router should make a DHCP IP address request broadcast on the WAN to your ISP's DHCP server. You would also click the radio button to get the IP addresses of your ISP's DNS servers automatically. On most home routers, these are the default settings. If your router has these settings, you won't need to change anything. I'm changing from static to dynamic here so that you can see the changes. (It's quite possible that you will have full Internet connectivity the moment you hook up your cable/DSL modem to your router. The default settings apply to the majority of high-speed Internet users. Your router may not look like the one above but look for settings for configuring your WAN IP address and DNS settings somewhere on the basis, WAN, or Internet setup page.
In our example, we were using a fixed IP address of 192.168.3.52 for the Internet IP address. If you recall the discussion on routers and private IP addresses, any address beginning with 192.168 is not a valid public IP address. So how did I get such an address from my ISP? The answer is that I didn't. For this example, I've hooked a second router off of one of the Ethernet switch ports of my home's LAN. I'm treating my LAN as if it's my ISP's WAN. The "LAN" this router serves is a second, even more internal LAN. My reason for doing this is preserving harmony within my home. If I disconnect and reconfigure my real router to the Internet as I'm performing these examples and capturing screenshots, I tend to raise the ire of those people near and dear to me. Once you have had an Internet connection sharing home network for a while, try disconnecting it for an hour or two in the early evening. You'll make quick enemies. I guarantee it. That said, the actions you will take are the same. Just remember that IP addresses starting with 192.168.3 in my example represent the WAN or Internet connection and those starting with 192.168.4 represent the LAN. There are ISPs that use 192.168.x.x type addresses for the IP addresses they give their clients. This is somewhat rare though.
Press the Apply button to make the new settings effective. Occasionally when I do this, I can no longer browse the router's home page. If this happens to you, you may have lost your IP address. You may need to run the ipconfig /renew command to get a new one. (See the example in the section Changing the DHCP Server's IP Assignment Range.) The next screen shows the results of our actions.
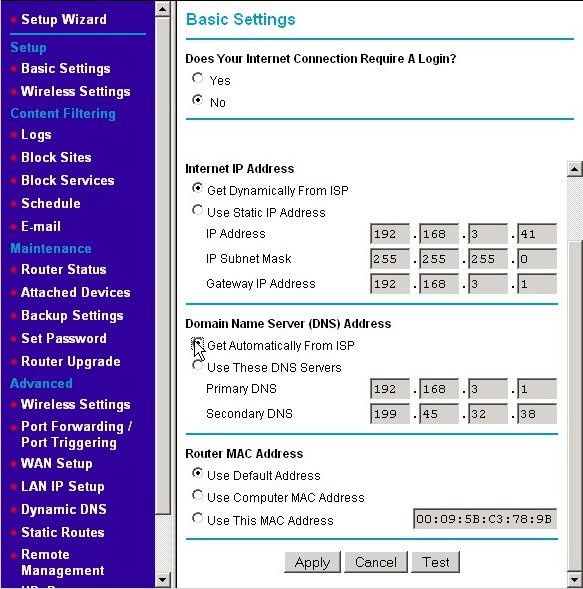
The IP address we received from the ISP's DHCP server is 192.168.3.41. The subnet mask, gateway IP address, and DNS IP addresses did not visibly change as these were already correct as my WAN settings. (Remember, I'm using a mock network inside my existing network. I just went from fixed to dynamic addressing in the example above. When you first connect your router to the Internet and apply your settings, the subnet mask, gateway IP address, and DNS values will likely change.) Most router manufacturer's put that addresses that were dynamically assigned in the text fields used for manual assignment, but grey them out (i.e., disable them from being edited.) Some just disable the fields and leave them blank, which makes it harder to see the effect of your actions.
Connecting to Your ISP Using Static IP Addressing
Connecting to your ISP using static IP addresses is much like setting up dynamic IP. You start by logging into your router as shown in the last section. However, you set the opposite radio buttons; namely, click on the Use Static IP Address radio button (also called "fixed" or "manual" IP addressing) and Use These DNS Servers radio button as shown below. (Again, the name on your router may be different. You're looking for a way that lets you manually type IP addresses into the four small text boxes like the ones shown.)
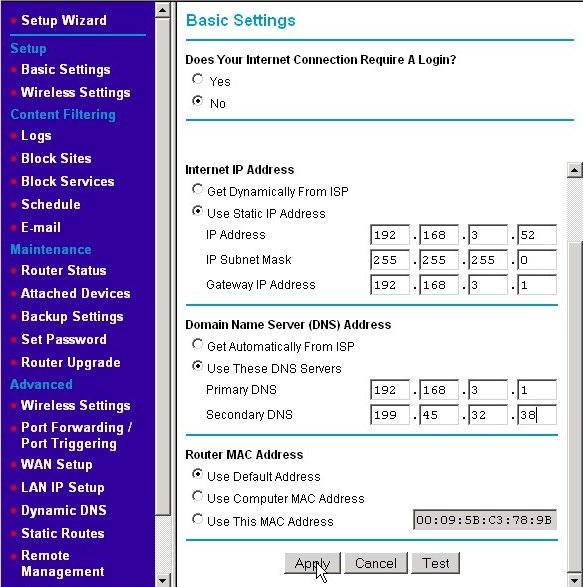
For my example network, I am making believe that my ISP assigned me the static IP address of 192.168.3.52. You would substitute the IP address that your ISP has assigned to you, and enter it into the IP address line. Each part of the IP address goes into a separate text box. (This is just like we did for assigning the internal LAN IP address.) The subnet mask is often set to 255.255.255.0, however, your ISP may give you another value. If so, enter that instead into the IP Subnet Mask line. Your ISP will also tell you what your gateway address is. For my example network, it is 192.168.3.1, which is actually the LAN IP address on my real internal LAN. Substitute yours in those boxes. Finally, enter the DNS server IP addresses given to you by your ISP. (ISPs often don't give these addresses to dynamic IP address customers as the DHCP response from your ISP's DHCP server will include that information. However, status IP address customers need to know that information, so if your ISP failed to give it to your, now's the time to see how good their technical support line is. Press the Apply button to make the new settings active.
Test Your Connection to the Internet
If all has gone well, you should now have connectivity to the Internet. One easy way to test this is to use a web browser to browse to a website that's almost guaranteed to be up. From one of the PCs on your LAN, try one of these websites: https://www.google.com and/or https://www.ebay.com. If you are not able to reach either of those sites, you may need to do a little troubleshooting on your LAN to WAN connection; see Test 5: The Handy-Dandy LAN Ping Test and Test 7: Testing for DNS Functionality. Repeat this test on the other PCs on your LAN (and other devices such as an Xbox [if possible]).
- Printer-friendly version
- Log in to post comments